1300 760 441
 cs@factoryfast.com.au
Frameless Shower Screen Maintenance: How to Clean Glass, Hardware and Seals
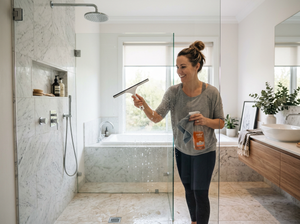

The most frustrating shower marks are usually the ones that were allowed to dry. Water droplets leave mineral deposits, soap creates a dull film, and moisture settles around hinges, brackets and seals. Once those layers overlap, wiping harder rarely solves the problem and may damage the finish you are trying to restore.
Effective frameless shower screen maintenance separates the screen into three care zones: glass, hardware and seals. Each needs a slightly different method. A simple routine also needs to reflect whether you own a fixed panel, hinged enclosure or channel-mounted screen.
The benefit of choosing frameless shower screens is that there are fewer bulky frame sections in which residue can collect. That does not make the screen maintenance-free, but it does make regular care faster when the right habits begin before deposits become stubborn.
Why Glass Cleaner Alone Is Not Enough
A frameless screen may look like one continuous surface, but it combines several materials. The glass is smooth and non-porous. Hinges, brackets, handles and channels can be stainless steel, brass or aluminium with polished, brushed, plated or powder-coated finishes. Flexible seals and cured silicone respond differently again.
A product that lifts residue from glass may be too aggressive for a decorative metal coating. An abrasive pad may clear a mark but leave fine scratches that make subsequent build-up more visible. Flooding a hinge with cleaner can push residue into joints rather than remove it.
Identify the type of build-up first
A faint spotted pattern is usually dried water. A cloudy or greasy-looking layer is more likely to include soap and personal-care product residue. Dark material around an edge, seal or silicone joint indicates that the area is staying damp or retaining grime.
Start with the mildest suitable method. Warm water, a small amount of mild dishwashing liquid and soft cloths will handle routine cleaning without turning a simple job into surface restoration.
Before using a specialised cleaner, check the screen or hardware care instructions. Test the product on an inconspicuous area and keep it away from finishes for which it is not intended.
Match the Routine to the Screen Configuration
The main maintenance choice is not the glass thickness or colour of the fittings. It is where water can settle and which moving parts require inspection.
Fixed panels have fewer moving components
A single fixed panel is generally the simplest configuration to maintain. Concentrate on the bottom edge, wall fixing points and the side facing the shower. Water can remain where the glass meets a floor bracket or channel even when the broad surface appears dry.
For example, this 90 x 210 cm fixed glass panel with chrome F-brackets uses 10 mm glass and two solid-brass brackets suitable for that thickness. Its open surface is straightforward to squeegee, while the small contact points around the brackets deserve more precise wiping.
Do not push, pull or lean on a fixed panel while cleaning. Use light pressure and let the cleaning solution soften residue before wiping.
Hinged doors need movement checks
A hinged enclosure introduces handles, gaskets and moving hardware. Clean around the hinge plates without forcing cloth, tools or liquid into the mechanism. Open and close the door normally after cleaning, listening for new noises and watching for changes in alignment.
The 90 cm wall-to-wall screen with chrome channels and stainless steel hinges combines 10 mm glass with wall and floor channels, a hinged door and a round handle. Compared with an open fixed panel, its care routine needs additional attention around the channel edges, hinge gaskets and closing path.
Never use the handle or door as support while reaching the top of the glass. If the door starts dropping, binding or contacting another hard surface, stop using it until the cause has been assessed.
Channels and seals create extra collection points
Channel-mounted wall-to-wall shower screens provide a clean enclosed layout, but their lower edges need deliberate drying. Run a cloth along accessible channel surfaces and remove any hair or residue that could obstruct drainage or retain moisture.
Door seals should sit evenly against the glass and adjoining surfaces. Warping, splitting or loss of contact can lead to water escaping even when the glass and hardware remain sound.
Build a Quick After-Shower Routine
The easiest way to clean shower screen glass is to prevent water from drying on it. Keep a plastic or rubber-edged squeegee inside the shower and use it after the final shower of the day.
Start at the top and draw the squeegee down in overlapping passes. Direct the remaining water towards the shower floor rather than onto external tiles. Wipe the bottom glass edge, brackets, handle and accessible hinge surfaces with a clean microfibre cloth.
Ventilation matters because drying the glass while leaving the entire room humid only solves part of the problem. Use the bathroom exhaust system or available ventilation after showering, particularly in a shared bathroom that stays wet for extended periods.
This routine should be gentle and brief. Vigorous polishing every day is unnecessary. Removing water before it evaporates is the useful action.
Complete a Thorough Weekly Clean
Weekly care should remove the residue that a squeegee cannot pick up. Prepare separate damp and dry cloths so that loosened grime is not spread back across the surface.
Clean the glass from top to bottom
Rinse loose residue away first. Apply warm water with a small amount of mild dishwashing liquid using a soft microfibre cloth or non-abrasive sponge. Work from the top towards the bottom so dirty liquid does not run over areas you have already finished.
Allow the solution enough contact time to soften light soap film, but do not let it dry on the panel. Wipe stubborn sections more than once rather than increasing pressure. Rinse with clean water, squeegee the surface and buff away remaining droplets with a dry cloth.
Clean both sides. The shower-facing surface usually carries more soap residue, while the outer face can collect dust, fingerprints and spray from nearby basins.
For deeper advice on treating deposits without damaging the surface, use Factory Fast’s detailed shower glass cleaning guide.
Treat hardware as a separate surface
Use a fresh soft cloth and mild soapy water on handles, brackets and visible hinge plates. Rinse the cloth, wipe away the soap and dry the metal immediately. Do not leave cleaning solution pooled around screws, gaskets or channel joins.
Avoid steel wool, scouring pads, abrasive powders and stiff brushes. These may scratch polished surfaces or alter the sheen of brushed and powder-coated finishes. Do not use metal tools to scrape residue from the edge of a fitting.
A soft cloth folded around a fingertip is usually enough for bracket edges. Where access is narrow, use a soft cotton bud without levering against the glass.
Clean seals without stretching them
Wipe accessible seals with mild soapy water, rinse and dry them. Do not pull a seal away from the glass simply to reach behind it. Repeated stretching can affect its fit, and a poorly seated seal may redirect water outside the shower.
If grime has collected beneath a removable seal, consult its instructions or have it removed and refitted correctly. A seal that remains discoloured after cleaning may still function, while one that is cracked, rigid or distorted may need replacement regardless of its appearance.
Treat Water Spots, Soap Film and Textured Glass Differently
When routine cleaning stops working, determine whether the issue is a surface film or a mineral deposit. Soap residue often feels slightly greasy and may clear with repeated mild washing. Mineral marks are usually more defined and remain after the surface has been degreased.
For persistent glass-only marks, use a cleaner confirmed as suitable for shower glass and follow its contact-time instructions. Protect surrounding hardware and rinse the panel completely. Do not assume that a stronger concentration will work better.
Textured or reeded panels need a different motion from flat glass. Wipe along the grooves with a soft cloth or brush designed for delicate surfaces. A standard squeegee may remove water from the raised areas while leaving moisture in the recesses, so finish with a dry cloth.
Never use a blade on glass unless the screen manufacturer specifically permits the tool and technique. Incorrect angles, damaged blades or contamination trapped beneath the edge can mark the surface.
Protect Chrome, Nickel, Black, Gold and White Finishes
Decorative finishes should be cleaned for preservation rather than polished aggressively. Mild soapy water, prompt rinsing and immediate drying are the safest routine when no more specific product instruction is available.
Polished chrome makes dried droplets easy to see but is simple to wipe when cleaned regularly. Brushed nickel can disguise light marks, although scrubbing across the grain may create uneven-looking patches. Matte black, gold-toned and white finishes should not be treated as bare metal; harsh chemicals or abrasive rubbing can change their appearance.
Avoid allowing glass cleaner to run down and remain on fittings. Spray onto the cleaning cloth where practical instead of saturating the entire screen. This gives you more control around hinge plates, handles and channels.
Households with mixed finishes should not assume one cleaning product suits every component. The safest approach is to identify the finish named on the exact product page or care documentation before treating stubborn marks.
Inspect the Screen While It Is Clean
Cleaning is the best time to check the parts that are difficult to assess when covered in droplets or residue. Use your eyes and ears rather than attempting structural adjustments yourself.
Check door movement and alignment
Open and close a hinged door through its normal path. It should move smoothly without scraping, dropping or striking another panel. A new gap, change in closing position or repeated need to lift the door indicates that cleaning alone will not solve the problem.
Do not tighten hinge or bracket screws casually. Frameless glass depends on correctly positioned fittings, gaskets and fixing pressure. Over-adjustment can create a different problem or place unwanted stress on the panel.
Examine seals and silicone lines
Look for gaps, peeling edges, splits or sections that no longer make contact. Persistent dampness outside the enclosure can help identify where water is escaping, but it may also relate to shower direction, floor fall or door alignment.
Clean silicone gently rather than trying to scrape discolouration away. If a joint has separated or no longer seals the edge, replacement requires correct surface preparation and curing.
Look at glass edges and fixing points
Inspect exposed glass edges in good light. Stop using the screen and seek qualified advice if you find a chip, crack or unexpected movement. Do not test a suspect area by pressing on it.
Also check whether handles feel secure and whether stabilising hardware remains in its intended position. Owners can wipe and observe these parts, but alignment, re-fixing and glass handling are tasks for an appropriately experienced installer.
Know When a Component Needs More Than Cleaning
Cleaning can remove residue, but it cannot restore a split seal, damaged coating, worn mechanism or compromised fixing. Repeated leaks, a door that no longer closes correctly, loose structural hardware or visible glass damage need assessment rather than another cleaning product.
When the glass remains sound but a compatible component has worn, explore shower screen accessories for suitable hinges, brackets and related hardware. Compatibility must be checked against glass thickness, hole placement, fixing type, panel dimensions and the original configuration before ordering.
For more detailed care around channels, handles and moving parts, read the shower screen hardware maintenance guide.
Choose Your Next Screen With Maintenance in Mind
Cleaning effort differs between configurations. A broad fixed panel has fewer moving parts and less edge hardware, making it a practical choice for households prioritising quick access to the glass. Hinged wall-to-wall designs provide greater enclosure but introduce seals, handles and hinge areas that require closer care.
Clear flat glass is easy to squeegee, while textured glass may disguise some marks but needs attention within its grooves. Wall channels provide continuous fixing and a neat edge, whereas small brackets expose more glass and create fewer enclosed metal surfaces. The right choice depends on water containment, access and how much detailed cleaning the household will realistically complete.
Before ordering a replacement, stand at the proposed shower opening with your arm extended and check whether you can comfortably reach both faces, the full top edge and every lower fixing point. A beautiful panel that cannot be reached without leaning on the glass is a maintenance problem designed into the bathroom.
 Tags:
Tags: