1300 760 441
 cs@factoryfast.com.au
How to Choose a Kitchen Sink Size: Cabinet, Bowl and Benchtop Measurements
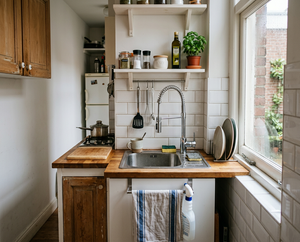

A sink can fit across the benchtop and still be the wrong size for the kitchen. The cabinet may be too narrow, the cut-out may not match, the bowl may interfere with plumbing, or an oversized basin may leave too little landing space beside it. These problems are difficult to solve once the benchtop has been cut.
The right kitchen sink size comes from checking several connected measurements: the cabinet interior, benchtop area, sink exterior, cut-out, bowl dimensions, bowl depth and tap position. Your cooking and cleaning habits then determine how that available space should be divided.
Factory Fast’s range of kitchen sinks includes compact single bowls, double-bowl layouts and larger workstation designs. Work through the following planning sequence before choosing among them.
Start With the Kitchen Project, Not the Sink Dimensions
A new kitchen and a replacement project present different constraints. In a new layout, the cabinet, sink and benchtop can be planned together. A replacement usually has to work with an existing cabinet, cut-out, tap position and plumbing arrangement.
Replacing an existing kitchen sink
For a replacement, record the existing sink’s overall length and front-to-back width. Then inspect how it is mounted and measure the actual benchtop opening from underneath where accessible. Do not assume the visible rim indicates the cut-out size.
A new topmount sink may cover an existing opening if its outer rim is larger than the cut-out while its bowl fits through it. An undermount replacement is less forgiving because the opening remains visible and must align neatly with the new bowl. Corner radius matters as well: a sink with square internal corners may not suit an opening prepared for a more rounded design.
Also check whether the benchtop or cabinet shows old holes, brackets or seal lines. Moving to a smaller sink can expose these areas even when the new bowl technically fits.
Planning a sink for a new kitchen
A new project gives you more freedom, but the sink should still be selected before the cabinet and benchtop details are finalised. This allows the cabinet width, cut-out and support arrangement to be matched to the chosen model.
Decide where the dishwasher, waste pipes and food-preparation area will sit. Leave practical bench space beside the sink for setting down hot cookware, stacking dishes or placing ingredients. The largest basin that fits is not necessarily the best choice if it consumes the preparation surface the kitchen needs.
When coordinating more than one element, review the broader kitchen fixtures and fittings before locking in the wet-zone layout.
Measure the Sink Cabinet Before the Benchtop
The base cabinet is the first hard limit on kitchen sink size. Its external width is useful, but the clear internal opening tells you whether the bowl, clips and plumbing can actually fit.
Measure the usable internal width
Open the cabinet and measure horizontally between its internal side walls. Subtract the space taken by structural panels, hinges, drawer hardware, reinforcing rails and any other obstruction near the top.
A sink’s external width should not be compared directly with the cabinet’s labelled width. The bowl usually drops below the benchtop, while mounting clips or supporting hardware can extend beyond it. The product’s minimum cabinet requirement is therefore more reliable than an estimate based only on the sink’s outer dimensions.
Take measurements near the front and back of the cabinet as well as through the centre. Cabinet interiors are not always equally clear across their full depth.
Check front-to-back cabinet clearance
Measure from the inside of the front rail to the rear wall or rail. Account for plumbing, tap hoses and any service gap behind the cabinet. A broad sink may fit between the side panels but leave insufficient room behind the bowl for the mixer body and connections.
The benchtop must also retain enough material in front of and behind the cut-out. A sink that nearly fills the benchtop depth can create an awkward tap position or an uncomfortably narrow strip along the front edge. Use the exact product template or specified cut-out rather than assuming a uniform margin.
Inspect the cabinet below the proposed bowl
Bowl depth affects more than washing capacity. A deeper basin extends further into the cabinet and may conflict with shelves, bins, drawers, water connections or waste plumbing. Measure vertically from the underside of the benchtop to the highest obstruction.
If the cabinet contains pull-out storage, check its full movement. A waste fitting or deep bowl can block a drawer even when the sink itself clears the cabinet walls. Decide whether losing internal storage is acceptable before choosing extra depth.
Separate Sink Size From Bowl Size
Kitchen sink measurements usually describe the complete unit, not just the usable basin. Two sinks with similar external dimensions can provide very different washing spaces because their rims, dividers, accessory ledges and bowl configurations differ.
Overall dimensions determine physical fit
The exterior length and width show how much benchtop area the sink occupies. The cut-out dimensions show how much material must be removed. Neither measurement tells you whether your largest frypan, baking tray or stockpot will sit comfortably inside the bowl.
Always compare four figures when available:
- overall sink length and width
- required cut-out length and width
- internal bowl length and width
- internal bowl depth
Check the product-specific diagram because the cut-out is rarely identical to the outer size. Mounting method and rim design influence the difference.
Internal dimensions determine everyday usefulness
Bowl measurements describe the working space. Place your most awkward regularly washed item on a flat surface and measure it. This gives you a practical reference for deciding whether an uninterrupted single bowl or divided configuration will be easier to use.
A wide but shallow basin may accept baking trays while producing more splash. A narrower deep bowl may contain water well but make large cookware difficult to turn. People with limited reach may also find an exceptionally deep bowl uncomfortable when its base sits well below the benchtop.
Bowl corners change usable space and cleaning effort. Tighter corners provide a squared appearance and make fuller use of the footprint, while rounded corners are easier to wipe without working into sharp edges.
Choose the Bowl Configuration That Uses the Space Well
Once the cabinet and benchtop limits are known, decide how the available width should work. The main choice is whether to preserve one open washing area or divide the footprint into separate task zones.
Single bowls maximise uninterrupted space
A single bowl suits cooks who regularly wash oven trays, chopping boards and large pots. It can also be a sensible choice for a compact cabinet because a divider does not consume useful width.
Single bowls vary considerably. Some are compact utility basins, while workstation versions occupy a much larger cabinet. Compare the internal dimensions and included ledges rather than treating every single-bowl sink as a space-saving option.
Double bowls support separate tasks
A double bowl lets you soak in one section while keeping the other available for rinsing or food preparation. Equal bowls suit households that use both sides similarly. An asymmetrical design gives more room to the main washing bowl while retaining a smaller secondary basin.
The live 715 x 440 mm double-bowl stainless steel sink demonstrates this layout. Its overall depth is 205 mm. The larger bowl measures 450 x 400 x 205 mm, while the smaller bowl measures 200 x 400 x 205 mm. That distribution suits buyers who want task separation without giving both bowls equal benchtop width.
Before selecting any double bowl, test the size of the larger compartment against your cookware. A unit can look generous overall while neither individual basin accommodates the items you wash most often.
Workstation sinks need cabinet space as well as bench space
A workstation sink includes ledges that support accessories over the bowl. It can shift chopping, rinsing and drying into the sink footprint, which is helpful when the surrounding benchtop needs to remain clear.
This benefit comes with specific fit requirements. The live 812 x 482 mm workstation kitchen sink has an internal bowl measuring 775 x 406 x 254 mm. Its product page specifies a minimum base cabinet of 914 mm and minimum cabinet length of 889 mm. It includes a 430 x 300 mm cutting board, colander and folding drying rack.
Those dimensions illustrate why sink width cannot be judged in isolation. The bowl is large, the accessory system needs room to operate, and the cabinet must accommodate the installation below.
For a broader comparison of layouts, see the single bowl, double bowl and workstation sink guide.
Match the Sink to the Benchtop and Mounting Method
The mounting style affects the cut-out, visible edge and amount of usable benchtop. Confirm the intended installation before ordering because not every sink supports every mounting method.
Topmount sizing
A topmount sink drops into the opening from above, leaving a visible rim on the benchtop. The rim must overlap the cut-out on every side. This can make topmount models practical for replacements, provided the new bowl fits through the opening and the rim fully covers it.
Measure the existing cut-out rather than buying from the outer dimensions of the old sink. Confirm that clips can be accessed from below and that the benchtop has enough sound material around the opening to hold them.
Undermount sizing
An undermount basin attaches below the benchtop, leaving the opening visible. The cut-out therefore becomes part of the finished appearance. Its shape, dimensions and corner radii must suit the selected sink precisely.
This method also requires space below for mounting hardware. If replacing an existing undermount model, do not assume another sink with similar overall dimensions will align with the exposed edge. Compare the technical drawing and cut-out template.
Account for drains, tap holes and accessories
Drain position affects the plumbing path and remaining cabinet storage. A rear-positioned waste may leave more useful room at the front, while a central waste could align more easily with existing plumbing. Neither arrangement is automatically better; it depends on what is already inside the cabinet.
Check whether the sink includes a tap hole, allows alternative tap placement or expects the mixer to be installed through the benchtop. Integrated drainers and workstation accessories also need clear operating space. A cutting board or rack is only useful if it can slide, lift and be stored without striking the tap or splashback.
Plan Tap Reach and Clearance With the Sink
Sink and tap measurements should be considered together. A well-sized bowl can still perform poorly if the water lands too close to an edge, the mixer cannot rotate freely or the tap body has insufficient clearance behind it.
Position the water over the working area
Compare the tap’s spout reach with the front-to-back position of the bowl. The water should land in a useful central area rather than against the rear wall or close to the front edge. An unsuitable landing point can increase splashing and make large cookware harder to rinse.
A deep, wide basin may benefit from a pull-out spray because it can reach corners and large items. A compact bowl may need a more restrained spout height to keep water contained. Browse kitchen taps only after the bowl position and dimensions are understood.
Check the space behind and above the mixer
Measure between the rear of the sink and the splashback. Allow for the mixer base, handle movement and cleaning access. If the sink sits beneath a window or shelf, check the maximum tap height and any obstruction to the handle or pull-out hose.
For a double bowl, consider whether a swivel spout reaches both sections comfortably. For a workstation model, make sure the tap does not prevent the included accessories from moving across the ledges.
Avoid the Most Common Kitchen Sink Sizing Mistakes
Buying from the cabinet’s nominal width is a common error. Internal panels and hardware reduce usable room, so the external cabinet measurement should never be the only fit check.
Another mistake is judging capacity from overall sink length. A divider, drainer or accessory ledge can leave less open bowl space than expected. Internal measurements are the numbers that determine whether cookware fits.
Do not enlarge an existing benchtop opening until the new product and its template are available. Product names and rounded dimensions are not precise cutting instructions. A small discrepancy can affect rim coverage, exposed edges or mounting-hardware access.
Avoid choosing bowl depth without inspecting the cabinet below. More depth may reduce splash and hide dishes, but it can also interfere with storage and create a less comfortable reach. Consider both the space above and below the benchtop.
Finally, do not choose the tap after the sink has been installed. Spout reach, height, tap-hole placement and handle clearance influence whether the completed setup feels controlled or awkward.
Complete a Final Measurement Check Before Ordering
Record the cabinet’s clear internal width, front-to-back clearance and unobstructed vertical space. Add the benchtop dimensions, current cut-out measurements where applicable, preferred mounting style and desired internal bowl size.
Compare that record with the exact product page and technical drawing. Confirm the minimum cabinet requirement, exterior dimensions, bowl measurements, depth, drain position, included fittings and cut-out information. Where a dimension is missing or unclear, verify it before the benchtop is altered.
Before ordering, photograph the open cabinet with a tape measure visible across the width, depth and vertical clearance. Keep those photographs with the selected sink’s specifications so the person preparing the cut-out can identify pipes, rails and storage hardware that a simple written measurement might overlook.
Frequently Asked Questions
Related Articles
-
 Tags:
Kitchen Sinks
Tags:
Kitchen Sinks