1300 760 441
 cs@factoryfast.com.au
Wall-to-Wall Shower Screens Buyer Guide: How to Choose the Right Fit, Door and Hardware
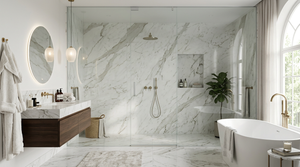

A wall-to-wall shower screen can turn a recessed shower into a contained, visually clean zone, but only when its dimensions and movement suit the finished bathroom. The product width is just the beginning. Door clearance, panel proportions, wall condition, mounting hardware and floor detail all influence whether the screen feels natural to use or becomes an expensive obstruction.
This buyer guide explains how to compare wall-to-wall shower screens for an Australian bathroom renovation. Start with the recess, work through the entry and hardware, then choose the finish. That order keeps appearance important without allowing it to override fit.
What Is a Wall-to-Wall Shower Screen?
A wall-to-wall shower screen spans the opening between two opposing walls, usually across a dedicated shower recess. Unlike a corner enclosure, it does not need a glass return panel to create the second side. Unlike a single walk-in panel, it generally closes the full front opening with a door and fixed or hinged glass section.
That layout makes sense when the shower already has solid walls on the left and right. It can provide more complete splash containment than an open panel while keeping the glass line aligned with the recess. Frameless versions minimise visible framing, so the tilework and full depth of the shower remain easy to see.
The layout is less suitable when one side of the shower is open, when the walls are not positioned to support the listed hardware or when the entry needs a sliding action. In those cases, compare the broader shower screens range before forcing a recess-style enclosure into the plan. Corner, fixed-panel and sliding formats solve different spatial problems.
Measure the Finished Recess Before Comparing Sizes
The most useful measurement is the actual opening after tiles and finished floor surfaces are in place. Measuring an unfinished wall-to-wall gap can create a false sense of certainty because tile build-up changes the final width.
Take Three Width Readings
Measure between the finished walls near the floor, at the midpoint and near the intended top of the glass. Record all three in millimetres. If the readings differ, the walls are not perfectly parallel or plumb, and the smallest dimension becomes the critical comparison point.
Do not assume a nominal 110 cm product is a universal answer for every opening around that size. Read the listed glass breakdown and mounting method. A wall channel may create a different installation relationship from discrete brackets, and neither should be treated as permission to guess at adjustment.
Measure height from the finished floor, then check the shower head, shelves, niches and ceiling clearance. Most wall-to-wall examples in the current range use glass around 2000 mm high, but the door panel and adjoining panel may differ slightly in height. That is normal product geometry, not a reason to round the room measurement.
For a complete room-by-room process, use the shower screen measuring guide and keep the smallest width, finished height and nearest obstruction on the same note.
Check the Floor and Wall Lines
Width alone cannot show whether the fixing areas are suitable. Identify where each wall channel or bracket will land and whether the surface behind it is ready for the specified fixing method. Check the floor fall and the position of any hob or shower base so the bottom edge and water-management pieces can sit as intended.
If the two walls lean in opposite directions or the floor is visibly uneven, pause the product decision. Frameless glass is precise, and a mounting component can only accommodate the variation stated for that exact configuration. An installer should confirm the finished opening when the measurements are inconsistent.
Choose the Door Around the Room, Not Just the Shower
A hinged door uses space on both sides of the glass line when the hinge allows inward and outward movement. Mark that path with painter's tape or a piece of cardboard cut to the listed door width. Then operate the bathroom as usual: approach the vanity, reach the towel rail and walk past the shower.
Door Width and Fixed-Panel Proportion
Nominal screen width does not tell you the entry width by itself. In one current 90 cm configuration, the glass is divided into a 610 x 1990 mm door and a 280 x 2000 mm hinge panel. A 110 cm option uses a 650 x 1990 mm door with a 440 x 2000 mm adjoining section. The wider overall screen adds more fixed glass, while the door grows by only 40 mm.
That distinction matters in a compact ensuite. A 610 mm door may clear a nearby fixture more easily, while a 650 mm door can provide a more generous passage but needs a larger swing zone. Choose by both the clear opening and the movement path, not by assuming the widest screen automatically has the widest or most comfortable entry.
The 90 cm wall-to-wall frameless screen with chrome channels illustrates the compact split: 10 mm glass, the 610 mm door, a 280 mm adjoining panel, and wall and floor channels that are cut to size during installation. It suits a buyer whose measured recess and room clearance match that exact arrangement.
Inward, Outward or Sliding Movement
An inward-opening action preserves the bathroom walkway but needs clear space inside the shower, including clearance from the shower head, controls and any seat. Outward movement makes entry and exit straightforward but can place water from the door over the bathroom floor. Dual-action hinges provide flexibility, yet both paths still need to be tested.
If a vanity or toilet occupies the swing zone, do not accept a daily collision as the price of a frameless look. A sliding screen may be the correct format. The goal is not to fit glass into the opening at any cost; it is to make the room easier to use.
Compare Glass and Mounting Hardware as One System
Frameless wall-to-wall screens in the reviewed range commonly use 10 mm toughened glass. The thickness helps create the substantial, unframed appearance buyers expect, but the glass does not work alone. Hinges, channels, brackets, handles and bottom-edge components determine how the enclosure mounts and moves.
Wall Channels Versus Brackets
A wall channel runs along more of the glass edge, creating a continuous vertical line. It can look visually defined and may suit buyers who want the edge hardware to echo other linear bathroom fittings. Some products also include a floor channel, which continues that treatment along the base of the fixed section.
Discrete brackets expose more glass around the mounting points. That can create a lighter appearance, but it also makes the position and finish of each fitting more noticeable. F-brackets and U-brackets are not interchangeable style labels; they are parts of specific product assemblies. Compare what is supplied, where it mounts and which glass thickness it suits.
The 110 cm gunmetal wall-to-wall frameless shower screen pairs a 2100 mm anodised aluminium wall channel with a 440 x 2000 mm hinge panel and a 650 x 1990 mm door. Its stainless steel hinges open in both directions and are listed for a maximum 45 kg load. Those details show how panel size, edge support and door hardware form one configuration.
Hinges, Handles and Bottom-Edge Pieces
Check whether the hinge action is single or dual direction, whether it self-centres, and whether its stated glass thickness and load suit the supplied door. A handle also affects daily grip and cleaning. A small round knob keeps the visual line minimal, while a double-pull design gives a more substantial grip from both sides.
Review the package contents rather than assuming every screen includes the same seals, channels, brackets or floor pieces. Browse compatible shower screen accessories only after identifying the exact screen system; an accessory that looks similar may not suit the glass thickness, hole pattern or finish.
Select a Finish That Works With the Whole Bathroom
Hardware colour is highly visible on a frameless enclosure because there is no surrounding frame to dilute it. Chrome can connect easily with bright tapware and gives the glass edge a familiar reflective detail. Black creates stronger contrast against light tiles. Gunmetal provides a softer dark accent, while gold makes the hinges, brackets and handle a deliberate design feature.
Finish should be chosen across the whole hardware set. Mixing a black wall channel, chrome hinge and unrelated handle can make a carefully planned screen look assembled from leftovers. Compare the screen fittings with the shower mixer, rail, basin tap, cabinet handles and towel rails under the bathroom's actual lighting.
Scale also changes how strongly a finish reads. On the 120 x 200 cm frameless screen with gold hardware, the 10 mm glass is paired with two hinges, three brackets and a square handle. Across a larger opening, those warm metal points become part of the room's visual rhythm rather than a tiny accent.
Do not make colour the deciding factor when two products use different support systems. First select the screen whose dimensions, door path and included hardware work. Then choose the available finish that best connects it to the room.
Plan Water Containment and Cleaning Before Installation
A full-width enclosure can manage splash more effectively than an open front, but the result depends on more than the presence of a door. Shower head direction, door-edge gaps, bottom seals, floor fall and the position of the opening all influence where water travels.
Follow the Water Path
Stand inside the unfinished or existing shower and note where the spray points. A door seam positioned directly in the strongest spray path asks more of the seals and bottom edge. If the shower head can be oriented towards a tiled wall instead, the screen has an easier job.
Check where water will land when the door opens outward. A bath mat may catch occasional drips, but it should not compensate for a layout that routinely directs water into the main walkway. Discuss the bottom seal, floor channel or other supplied water-management components with the installer before fitting.
Allow Access for Regular Cleaning
Frameless glass removes much of the surrounding frame where residue can collect, yet the edges and hardware still need access. Make sure the door can open far enough to wipe around hinges and seals. A fixed panel pressed too close to a vanity can leave a narrow, frustrating cleaning gap outside the shower.
Clear glass shows the shower interior and can make a recess feel open, so the condition of tile grout and fittings becomes more visible. Buyers who enjoy that open look should also plan for a quick glass wipe after use and periodic attention around brackets, channels and the bottom edge.
Installation Questions to Resolve Before Ordering
Wall-to-wall glass rewards early coordination between product choice and installation. The screen must suit the finished opening, and the fixing locations must suit the bathroom surfaces. Confirm who will take final measurements, who will install the enclosure and whether they have reviewed the exact product page.
Ask the Installer These Questions
- Are the finished walls plumb enough for this product's channel or bracket system?
- Does the smallest opening width match the listed glass configuration?
- Where will the door stop in both directions?
- Are the planned fixing points suitable for the supplied hardware?
- How will the bottom edge meet the finished floor, hob or shower base?
- Are all required seals, channels, brackets and fixings included or identified?
Do not order from an old plan measurement when tiling is still changing the opening. Likewise, do not substitute a similarly coloured hinge or bracket without checking glass compatibility and mounting details. Heavy glass and precise hardware work as an assembly, so late improvisation can change fit and door movement.
Build the Shortlist in the Right Order
Start with products that match the smallest finished recess width. Remove any option whose door conflicts with the room or whose panel breakdown does not suit the entry. Next, compare the mounting system and package contents. Only then should glass styling, handle shape and finish decide between the remaining choices.
This sequence also keeps budget comparisons honest. Two screens with the same nominal width may include different channels, brackets, handles or bottom-edge pieces. Comparing the complete configuration helps reveal whether an apparently cheaper option needs extra compatible components or creates more installation complexity.
Before checkout, photograph the taped door arc with the vanity, toilet and towel rail visible, then save it beside the three finished-width readings and the chosen product page. That single installation record gives everyone the same wall-to-wall geometry before the glass is unpacked.
 Tags:
Tags: