1300 760 441
 cs@factoryfast.com.au
Bath and Shower Mixers Buyer Guide: How to Choose Control, Finish and Installation Fit
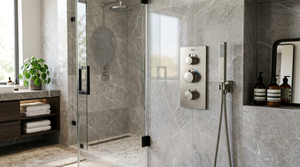

A mixer is a small fitting with a large influence on how a bathroom works. It controls the temperature and flow every day, sits at the centre of the bath or shower layout, and is difficult to reconsider once the wall is finished. That makes the best choice less about picking a fashionable handle and more about matching the control, concealed body, outlet and finish to the project around it.
The Factory Fast bath and shower mixers range includes rounded and square designs in finishes that can be coordinated with shower heads, bath spouts, screens and accessories. Use the decision path below before narrowing the range. It separates the choices that affect installation from the ones that affect appearance, so the mixer you order suits both the plumbing plan and the way the room will be used.
What a Bath or Shower Mixer Actually Controls
A bath or shower mixer blends the hot and cold supplies and lets the user control the resulting temperature and flow from one point. The visible plate and handle are only the parts you touch. The working body sits behind the wall, which is why a mixer should be chosen before the wall finish is completed rather than treated as a last-minute styling detail.
The same mixer style may be suitable for a bath outlet or a shower outlet, but the surrounding system changes. A bath installation sends mixed water to a bath spout. A shower installation sends it to a fixed head, handheld outlet or combination set. The mixer does not decide where the water lands; the outlet layout does. This distinction prevents a common buying error: choosing the control without planning the fitting it must supply.
Mixer, Diverter and Outlet Are Different Decisions
A simple mixer controls temperature and flow to one outlet path. A shower with more than one usable outlet may also need a diverter or a combination assembly that manages the change between overhead and handheld functions. Do not assume a standard wall mixer will independently select several outlets. Confirm what is included with the shower set and what the plumbing design still requires.
For a bath, the visible relationship is between the mixer and spout. For a shower, it is between the control, shower head, hose, rail or bracket. List those parts as one system before buying any individual item. This gives the installer a complete picture and keeps finish or shape decisions consistent.
Start With the Project Type, Not the Finish
The first branch in the decision tree is whether the job is a straightforward replacement, an open-wall renovation or a new layout. Each gives you a different level of freedom.
Replacing an Existing Mixer
A replacement can look simple because the opening already exists, but the concealed body, wall depth, pipe positions and plate coverage still matter. A new faceplate needs to cover the finished opening neatly. The body must suit the available cavity and connection arrangement.
If the existing mixer is being removed because it is difficult to operate or no longer performs as expected, record the old product details before disposal. Those details can help the installer understand what is behind the wall.
Do not buy on handle shape alone. Ask the installer whether the replacement will use the existing arrangement or require access behind the wall. A small visual change can become a larger job if the concealed parts do not align.
Renovating With the Wall Open
An open-wall renovation gives you more choice because the mixer height, outlet position and pipework can be planned together. This is the right time to compare the complete bathroom fixtures and fittings range, not just the mixer.
The basin tap, bath outlet, shower head, screen hardware and accessories will share the room, so the fixture schedule should settle shape and finish before rough-in positions are fixed.
For a shower, stand where the user will stand and consider how easily the handle can be reached without stepping into the initial spray. For a bath, check that the control is accessible from beside the bath and does not conflict with a screen, ledge or nearby wall. These are layout decisions, not decorative ones.
Creating a New Bath and Shower Arrangement
A new layout should be planned from the user outward. Decide the outlet type, comfortable control position, service access and wet-zone layout, then choose the mixer that supports that plan.
If a bath and shower share the same area, clarify whether they use separate controls or a coordinated multi-outlet arrangement. The phrase “bath and shower mixer” describes product suitability, not an automatic two-outlet installation.
Compare Handle Shape, Body Material and Cartridge Detail
Once the installation path is clear, compare the parts that affect use and ownership. Three details deserve more attention than marketing labels: how the handle feels, what the body is made from, and whether useful cartridge information is provided.
Rounded or Square Control
Rounded controls tend to suit bathrooms with curved basins, round shower heads, arched mirrors or softer accessory shapes. The rounded chrome bath or shower mixer uses a restrained circular form and a solid-brass body. It can blend into an existing chrome scheme without turning the control into a feature.
Square controls create a stronger line. They make sense beside rectangular basins, square shower heads, straight screen channels and block-like cabinet handles. The square chrome shower or bath mixer is a useful comparison when you want chrome but prefer a more architectural plate and lever.
Neither geometry is inherently more practical. The right choice is the one that feels comfortable in the hand and repeats the dominant shapes already in the room.
Solid-Brass Body Construction
The mixer body is hidden after installation, so construction material is more consequential than the surface colour alone. The Factory Fast examples above list solid-brass construction. When comparing alternatives, check the product page for body material rather than assuming every item with a similar finish is built the same way.
This is also the point to review what is included in the package. The visible plate and handle may be obvious in the product images, but the listing should be checked for the complete supplied assembly. If a measurement or inclusion is not stated, treat it as a question for confirmation rather than estimating from a photograph.
Cartridge Size and Future Records
Cartridge information can help distinguish products that otherwise look similar. The rounded black bathroom mixer lists a 35 mm cartridge as well as a solid-brass body. That does not make cartridge size the only buying criterion, but it is a concrete specification worth recording with the order information.
Keep the product page, model details and installation information in the renovation file. Concealed fixtures are easier to discuss later when the original reference has not been lost. This simple ownership habit is more useful than relying on memory after the packaging has been discarded.
Match the Mixer to the Correct Outlet
A mixer should be selected with the outlet it will feed. This is where bath and shower projects diverge most clearly.
Bath Mixer and Spout Planning
For a bath, compare the bath spouts collection while choosing the control. Spout reach needs to carry water far enough over the bath edge without projecting awkwardly into the bathing space. Its mounting point, bath rim width and wall build-up all affect where the water will land.
Coordinate the spout and mixer as a pair. A square control beside a strongly curved spout can look accidental unless other fittings bridge the two shapes. A finish described by the same broad colour name can still differ in sheen or tone, so closely matched product families are preferable when an exact visual match matters.
Shower Mixer and Head Planning
For a shower, decide whether the outlet will be a fixed wall head, rain head, handheld spray or combination. A simple fixed head keeps the system visually quiet. A handheld adds reach for rinsing and cleaning. A combination shower adds flexibility but brings a diverter, hose and mounting position into the plan.
The mixer position should make sense in relation to the door or open entry. In a walk-in shower, placing the control where it can be reached before the user is directly under the outlet can make the daily routine more comfortable.
In a compact enclosed shower, check that the handle movement will not be crowded by a return panel, shelf or door path.
Choose a Finish as Part of a Whole-Room Scheme
Chrome and black create different maintenance and styling expectations. The best finish is usually the one already repeated across the major fixtures, not the one that looks most dramatic in isolation.
Chrome reflects surrounding colours and pairs readily with many existing fittings. It is a practical direction for a partial update because replacement pieces are less likely to look visually isolated. A reflective surface can show splashes, so regular wiping may be part of the preferred appearance.
Black gives the mixer more visual weight. It works best when supported by other black elements such as a shower frame, head, accessory or cabinet handle. If the room contains only one black fitting, that piece can appear disconnected. The finish also rewards gentle, routine cleaning because residue is more visible against a dark surface.
Look beyond the wet zone when building the palette. The earlier bathroom mirrors buyer guide explains how mirror shape and frame treatment affect the vanity wall. Repeating the mixer’s round or square language at the mirror and accessories can make separate purchases read as one planned room.
Fit the Control to the People Using It
A good mixer should be easy to understand and comfortable to reach. Consider the household before settling the handle and position.
For a family bathroom, a clear single lever can make everyday adjustment straightforward, while the surrounding shower setup may benefit from handheld flexibility. In a guest bathroom, an intuitive control matters more than unusual styling because visitors need to understand it immediately.
In an ensuite, the priority may be a quiet finish and handle movement that does not interrupt a narrow circulation path.
Lever projection also deserves attention. A control can fit within the wall area yet still feel awkward if the handle swings towards a screen edge or is mounted too close to a shelf. Ask the installer to confirm the operating arc and finished-wall position, especially when the product dimensions are not fully stated online.
Avoid the Mixer Buying Mistakes That Cause Rework
The most expensive mistakes often happen before the mixer is installed.
Choosing after the wall is finished reduces your ability to adjust the body position or access. Buying the mixer without the outlet can leave mismatched finishes or an incomplete control arrangement. Assuming that all black, chrome or brushed surfaces match can create visible tone differences. Treating a product image as a scale drawing can lead to incorrect clearance decisions.
Another common problem is making the whole selection from the front view. The faceplate may suit the room, but the concealed depth, supplied parts and connection arrangement determine whether the installation is straightforward.
Give the installer the exact link before work begins and ask for any compatibility concern to be identified while alternatives are still easy to consider.
Do not let price alone separate the shortlist. Compare like with like: body material, included components, cartridge detail, handle geometry, finish, project fit and the work required to install it. A lower item price can be poor value if it creates avoidable wall changes or does not belong with the outlet you have chosen.
Build a Final Mixer Shortlist
Start with the room and project: bath or shower, replacement or renovation, single outlet or more complex shower arrangement. Remove any option that does not fit that plumbing plan. Next, compare body construction, stated cartridge detail and included components. Only then narrow the remaining choices by shape and finish.
Use the bath and shower mixers collection to compare products against that sequence. A shortlist of two or three compatible options is more useful than a long list chosen by colour. Share the exact pages with the installer and confirm the outlet, wall position and access before ordering.
One final step can save uncertainty years later: before the wall is closed, add the mixer link, model details and a clear photograph of the rough-in position to the home’s renovation records. The control may be visible every day, but that record preserves the information hidden behind it.
Frequently Asked Questions
-
 Tags:
Bath and Shower Mixers
Tags:
Bath and Shower Mixers