1300 760 441
 cs@factoryfast.com.au
Wall Mirrors Buyer Guide: Choose the Right Size, Shape and Placement
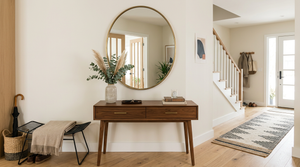

A wall mirror has to succeed twice: it must give you the reflection you need and make sense as part of the room. A design that looks impressive on its own can still feel awkward if it reflects a cluttered corner, competes with nearby furniture or is too small for its intended task. The best choice begins with use and sightlines, not frame colour.
This wall mirrors buyer guide takes you through the decisions in the order that matters. You will define the mirror’s job, measure the available area, compare shapes and orientations, choose between framed, frameless and illuminated options, and plan a position that works in an Australian home. You can then compare the available wall mirrors with a clear brief instead of choosing by appearance alone.
Start With the Job Your Wall Mirror Must Do
The same piece of glass cannot automatically serve every room equally well. A dressing mirror needs enough vertical reflection for checking an outfit. A mirror over a console may primarily balance furniture and brighten an entry. A decorative design in a living room may need to hold visual weight without becoming the strongest object in the space.
Write down one primary job before considering shape. Secondary benefits are welcome, but the main purpose should decide the dimensions, orientation and mounting height.
Dressing and grooming
For head-to-toe outfit checks, a tall format is generally more useful than a wide decorative design. The critical dimension is not simply the mirror’s overall height; it is whether the reflective area captures the required view from a natural standing position. Also consider how far you can step back. A large mirror in a narrow passage may provide a less useful view than a slightly smaller one positioned where there is clear standing room.
For face-level grooming, place the reflective area around the user’s normal eye line and consider the light falling on the face. A mirror that receives strong light from behind the viewer can still leave facial details in shadow.
Adding light and perceived depth
A mirror does not create daylight, but it can redirect light and repeat a brighter part of the room. Positioning one where it reflects a window, pale wall or open area can make a compact room feel less enclosed. Before committing, stand where the mirror will hang and look towards the proposed reflection. The useful question is not “Where is the light?” but “What will the mirror show during the hours this room is used?”
Avoid assuming that a larger reflective surface is always better. If it captures a television, busy shelving or a frequently open doorway, it may double visual noise. A more controlled size or a different angle can produce a calmer result.
Creating a focal point
When the main purpose is decorative, treat the mirror as wall decor with a functional surface. A circular outline can soften a room dominated by straight cabinetry and rectangular furniture. An arched top can introduce height and an architectural rhythm. A simple rectangle can reinforce clean lines and suit spaces where other finishes should remain the focus.
The frame determines how assertive the piece feels. A broad or contrasting border reads more like artwork, while a narrow frame lets the reflection carry more of the visual effect.
Choose the Mirror Type That Matches the Use Case
Once the job is clear, narrow the category. This prevents attractive but unsuitable features from pulling the decision off course.
Decorative wall mirrors
Decorative mirrors suit entries, living rooms, dining areas and bedrooms where reflection and room composition matter together. Round, oval, arched and framed rectangular designs can all work; the best option relates to the lines already present. In a room full of angular furniture, a curved shape adds contrast. Where the scheme already includes several curved pieces, a rectangle can restore structure.
For a concrete size reference, Factory Fast’s 90 cm round white wall mirror uses 4 mm mirror-grade glass with an MDF frame and powder-coated finish. A 90 cm diameter has enough presence to be treated as a major wall element, so map the full circle rather than measuring only its centre point.
Full-length mirrors
A full-length wall mirror is the practical choice for bedrooms, dressing areas and walk-in wardrobes. Prioritise reflective height, usable standing distance and the width needed for a comfortable view. A narrow design can fit beside a wardrobe, while a broader one may feel more balanced on an otherwise empty wall.
Some products offer more than one placement mode. The verified 160 × 50 cm LED full-length mirror, for example, can be mounted or used with its stand. It combines an aluminium frame and powder-coated MDF base with adjustable brightness and colour temperatures of 3000 K, 4000 K and 6000 K. That flexibility suits buyers who may change a bedroom layout or want task lighting for dressing.
Bathroom and illuminated mirrors
General wall decor and bathroom use should not be treated as interchangeable. Humidity, cleaning frequency, proximity to water, power access and the product’s stated room suitability all become more important in a bathroom. If that is the destination, begin with the dedicated bathroom mirrors rather than assuming any decorative design will suit.
Illumination is most valuable when it solves a genuine lighting problem. Consider whether the mirror will provide task light for grooming, softer ambient light or both. Check the product’s power arrangement, cable length, control position and listed installation details before purchase. An LED border is not a substitute for planning where the face, mirror and other room lights sit in relation to one another.
Measure the Wall, Furniture and Reflection Together
Mirror sizing is a three-part exercise: the object must fit the wall, relate to nearby furniture and produce the required view. Measuring only the empty wall can lead to a technically fitting result that feels poorly proportioned.
Record the usable wall area
Measure the clear width and height after accounting for switches, power points, doors, curtains, shelving and furniture. Check how doors and cupboards move through the space. Mark any obstruction that would make installation or cleaning difficult.
Next, identify the fixing zone rather than assuming the whole wall is equally usable. The product’s mounting points may sit inside the outer dimensions, and the suitable hardware will depend on the wall construction and the item’s listed weight. If those details are not clear on the product page, confirm them before ordering or installation.
Relate the mirror to furniture below it
For a mirror above a console, dresser or sideboard, compare its full outer width with the furniture, not just the reflective glass. A mirror that is slightly narrower than the piece below often creates a contained grouping; one that extends beyond it becomes a much stronger statement and needs deliberate justification.
The gap between furniture and mirror also affects whether they read as one arrangement. Use removable tape to outline the exact outer dimensions, then view it from the doorway and the main seating or standing position. This simple test reveals whether the object feels disconnected, cramped or balanced.
Test the reflected view
Stand at the places from which the mirror will actually be used. Check the reflection at seated and standing eye levels where relevant. A living-room design may look well placed from directly in front but reflect ceiling fittings or a blank corridor from the sofa. In an entry, it should provide a useful last look without directing attention into household storage.
For a dressing mirror, mark the proposed top, bottom and width, then test your normal viewing distance. If the room does not let you step back comfortably, prioritise a position with a clearer approach rather than simply increasing the dimensions.
Compare Round, Rectangular, Arched and Oval Shapes
Shape changes both the amount of usable reflection and the visual role of the mirror. It should be chosen after purpose and available area are known.
Round mirrors soften strong lines
A round mirror creates contrast above rectangular consoles, chests and sideboards. Because it has no corners, its usable width reduces towards the top and bottom. That is usually acceptable for decorative placement or face-level use, but it is less efficient where a large vertical viewing area is the priority.
Circular designs also need breathing room on both sides. Mark the whole diameter on the wall to judge scale accurately. A measurement taken across the centre does not convey how the curve will interact with nearby lamps, shelving or artwork.
Rectangular mirrors maximise reflective area
Rectangles use their outer dimensions efficiently, making them practical for dressing, grooming and placement above furniture. Vertical orientation emphasises height and suits narrow wall sections. Horizontal orientation can visually broaden a console arrangement or fill a wide wall, although it may offer less head-to-toe utility.
The corners create a more structured look, which can complement modern cabinetry and linear architecture. A narrow frame keeps that geometry crisp; a wider border adds decorative weight.
Arched and oval designs balance softness with height
An arched mirror provides a rectangular lower area with a curved top, so it can retain useful vertical reflection while introducing a softer outline. It works particularly well where the room needs a sense of height without another hard-edged rectangle.
Oval forms are more fluid, but their narrowing ends reduce reflection at the top and bottom. They suit decorative and face-level uses where the silhouette matters more than maximising every centimetre of glass. Before choosing either shape, check that curtains, wall lights and tall furniture do not crowd the curved outline.
Select a Frame, Finish and Visual Weight
Frame choice affects more than colour coordination. It changes the apparent size, contrast and style of the mirror, and it can determine how easily the item relates to other finishes in the room.
Framed versus frameless
A framed mirror creates a defined boundary. Black can provide strong contrast, white can merge more gently with pale walls, and metallic finishes can echo lighting or furniture details. The wider and darker the border, the more the mirror behaves like a focal piece.
A frameless design puts emphasis on the reflective surface and can feel visually lighter. It may suit a restrained interior or a wall where surrounding materials already provide enough detail. Compare the exact edge treatment and mounting method on the product page; “frameless” describes the appearance, not a universal construction or installation system.
Coordinate, but do not over-match
Matching every metal or colour can make a room feel overly controlled. Instead, identify the dominant finish and one supporting finish. A mirror can repeat the dominant element for continuity or introduce the supporting one as a considered accent.
Look across the wider decor and lighting collection if the mirror is part of a room update. Consider its relationship with lamp shapes, wall art, clocks and furniture hardware. Repeating a curve, material or colour once elsewhere is often enough to make the choice feel connected.
Consider the frame’s physical depth
Product width and height do not tell you how far the mirror projects from the wall. Depth matters in narrow passages and beside opening doors. It also affects the shadow line around the frame and whether the piece appears flush or sculptural.
Check the listed overall dimensions, materials and included mounting information. Do not assume that two designs with the same face dimensions will have the same weight, depth or fixing points.
Plan Placement Around Light, Movement and Sightlines
Placement determines whether the mirror improves the room every day or repeatedly reflects the wrong thing. Evaluate it in daylight and after dark because the dominant view can change when lamps and screens are on.
Entry and hallway placement
In an entry, prioritise a clear approach and a useful face-level view. Avoid positions where an opening door can crowd the frame or where bags and coats will constantly interrupt the reflection. In a hallway, a mirror can relieve a long blank wall, but a heavily projecting frame may be inconvenient in a narrow traffic path.
Living and dining areas
Treat the reflected scene as part of the decor. A mirror opposite an orderly open area can add depth; one facing a visually busy zone repeats that busyness. Check the view from the main seats, not only from the wall directly opposite.
If the mirror sits above furniture, include the objects normally kept there when testing the composition. A taped outline that looks balanced above an empty console can feel crowded once lamps, bowls or plants return.
Bedrooms and dressing areas
For dressing, make standing space the first placement constraint. The best wall may be beside or near clothing storage, provided drawers and doors can still open freely. Check whether early daylight or evening room lighting gives an honest, usable reflection.
A mirror facing the bed is a personal preference, but it should be an active decision. Sit and lie in the normal positions before fixing it permanently to see which parts of the room will remain visible in the glass.
Check Mounting Details Before You Buy
Wall mirrors vary considerably in weight and attachment design. The correct choice of fixings depends on the product and wall construction, so the mounting plan belongs in the buying decision rather than being left until delivery day.
Review the stated product weight, overall dimensions, orientation options, hanging points and included hardware. Confirm whether the item is designed for vertical, horizontal or either orientation. If a product can stand or mount, check whether both components are included and whether the floor footprint works in your room.
Locate hidden services before drilling and use fixings appropriate to the wall and the load. Where the wall construction, fixing position or product instructions are uncertain, have the installation assessed by a suitably qualified person. Powered mirrors also require careful planning around the stated power supply and cable arrangement.
Avoid the Most Common Wall Mirror Buying Mistakes
The first common error is buying for an empty wall rather than the finished room. Furniture, lamps, curtains and moving doors all reduce the usable area. Map them before judging scale.
The second is treating outer dimensions and reflective dimensions as the same. A broad frame can make the overall product much larger while providing less glass than expected. Check both measurements when they are supplied, especially for grooming or dressing use.
Another mistake is ignoring what the mirror will repeat. The reflection becomes a persistent part of the room. A beautiful frame cannot compensate for a view dominated by storage, cables or a harsh light source.
Buyers also sometimes choose an illuminated design without confirming power access, controls or cable visibility. Decide how the light will be used and how the connection will be managed before making LED features a priority.
Finally, do not leave mounting questions until the item arrives. Product weight, wall type, fixing points and orientation can rule out an otherwise appealing position. Confirming them early protects the layout you planned.
Care for the Glass and Frame as Different Materials
Use the product care instructions as the first reference. For routine glass cleaning, apply a suitable cleaner to a soft cloth rather than saturating the edges or frame. Wipe gently and remove remaining moisture to reduce streaks.
Treat the frame according to its material and finish. Powder-coated surfaces, MDF, aluminium and other materials can have different moisture tolerances and cleaning needs. Avoid letting liquid collect along joints or behind the product. For illuminated designs, follow the stated cleaning directions and keep moisture away from electrical components and controls.
Regularly check that the mirror remains stable and that wall hardware shows no movement. This is especially relevant after furniture is shifted, walls are repainted or the item is taken down for cleaning.
Make the Final Choice With a Full-Scale Wall Test
Before ordering, create a full-size outline with removable painter’s tape and leave it in place through one daylight period and one evening. Stand at the doorway, sit in the main viewing position and walk the normal route past it. Photograph the taped shape from each point, then check what the future glass will reflect. This final rehearsal can reveal a poor sightline, cramped edge or inconvenient door movement that a product page cannot show.
Frequently Asked Questions
Related Articles
-
 Tags:
Wall Mirrors
Tags:
Wall Mirrors