1300 760 441
 cs@factoryfast.com.au
The Complete Guide to Squat Racks: Everything You Need to Know

Whether you’re building your first home gym or upgrading your current setup, choosing the right squat rack can transform your strength training journey from frustrating limitations to unlimited potential. As one of the most versatile pieces of home gym equipment, a quality squat rack serves as the foundation for countless exercises while providing the safety features necessary for solo training with heavy weights.
This comprehensive guide will walk you through everything you need to know about squat racks, from understanding the different types available to making an informed decision that matches your workout needs, space constraints, and fitness goals. By the end, you’ll have the confidence to invest in equipment that will serve your strength training journey for years to come.
What is a Squat Rack?
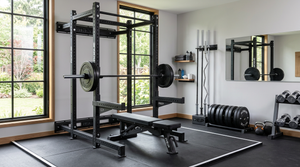
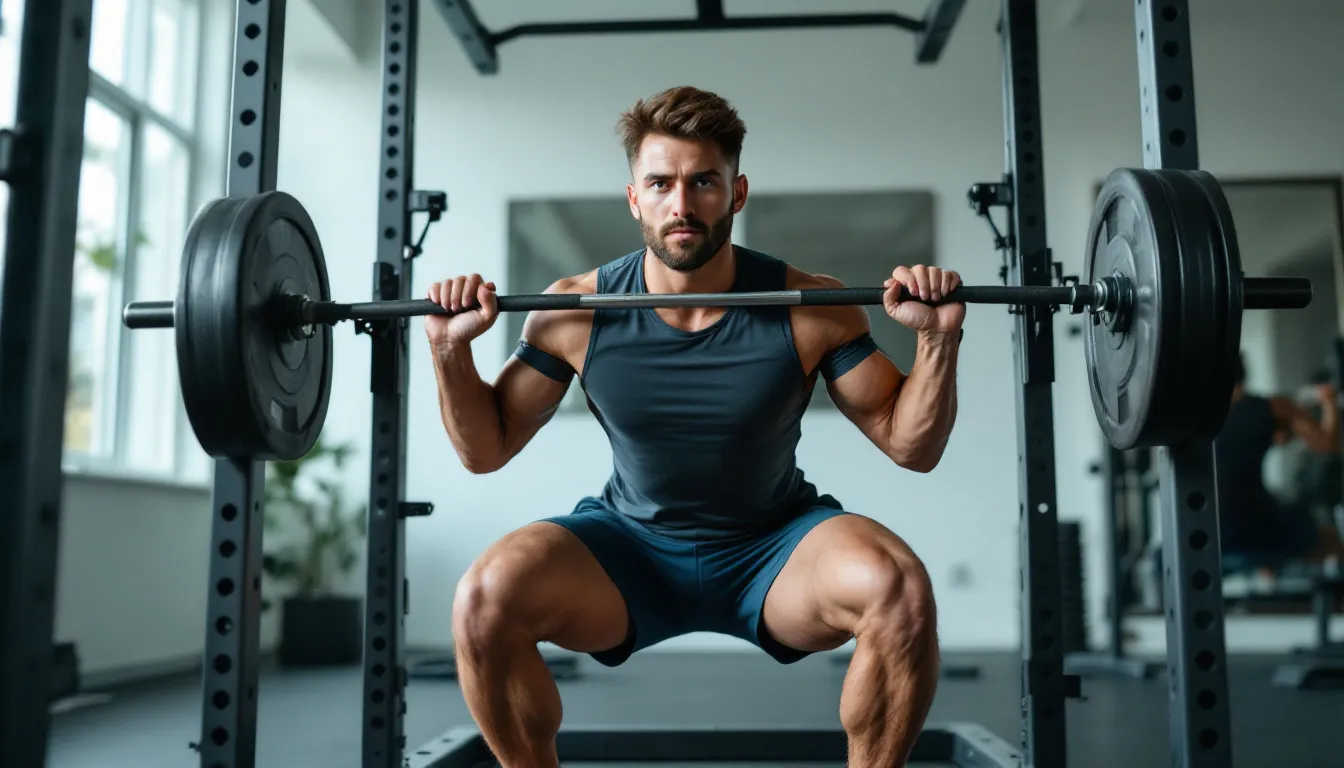
A squat rack is a fundamental piece of strength training equipment designed to safely support barbells during various exercises, with squats being the primary movement that gives the equipment its name. At its core, a squat rack consists of sturdy uprights with adjustable j hooks that hold the barbell at the correct height for your training needs.
The primary function of squat racks extends far beyond just supporting weight. These versatile units create a safe environment for solo weightlifting by incorporating safety bars that can catch the barbell if you fail a lift. This safety feature is essential for anyone who wants to train with heavy weights without requiring a spotter, making it possible to build strength progressively and confidently.
Modern squat racks typically feature a robust steel frame construction that can handle substantial weight loads, often ranging from 300 pounds for basic home models to over 1,500 pounds for commercial-grade equipment. The adjustable nature of the j hooks and safety mechanisms allows users to customize the rack for different exercises and accommodate various user heights.
In both home gyms and commercial fitness facilities, squat racks serve as the central hub for strength training. They enable a complete workout that targets all major muscle groups through compound movements, making them one of the most efficient investments for anyone serious about functional fitness and building strength.
Explore a wide range of high-quality equipment in our squat and power racks collection, perfect for building a versatile and space-efficient home gym tailored to your fitness goals.
Types of Squat Racks
Understanding the different types of squat racks available will help you decide which option best suits your space, budget, and training requirements. Each type offers distinct advantages and limitations that cater to specific workout needs and environments.
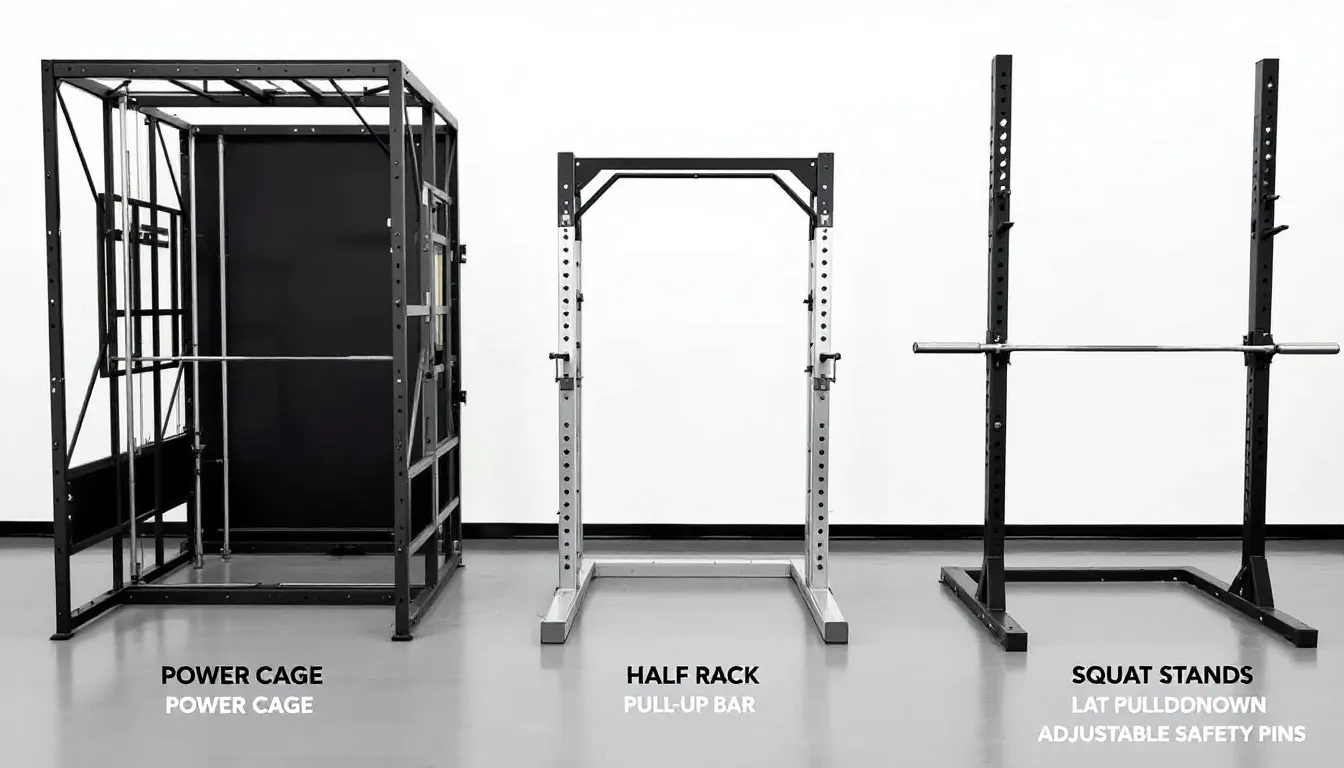
Power Racks (Full Cages)
Power racks, also known as power cages, represent the gold standard in squat rack design. These units feature four sturdy uprights connected by horizontal supports, creating a complete cage structure around the lifting area. The enclosed design provides maximum safety through adjustable safety bars positioned inside the frame.
Power racks offer the highest level of versatility, supporting everything from heavy squats and bench presses to overhead presses and rack pulls. Most quality power cages include integrated pull-up bars and multiple attachment points for accessories like dip bars and cable systems. While they require the most floor space and typically represent the highest investment, power racks provide unmatched safety and exercise variety for serious lifters.
Discover the ultimate strength training solution with the Power Rack Squat Deadlift HD Lift Cage, designed to support squats, deadlifts, and more with a robust 700 lbs weight capacity for your home gym.
Half Racks
Half racks bridge the gap between full power cages and basic squat stands. These units typically feature four uprights but with an open back design that reduces the overall footprint while maintaining good stability. Half racks often include safety features similar to power racks but require less ceiling height and floor space.
This design makes half racks an excellent choice for those who want enhanced safety features without the space requirements of a full cage. They’re particularly suitable for spare rooms or basements with limited ceiling height, while still providing the stability needed for heavy lifting sessions.
Elevate your workouts with the Power Rack Squat Cage Stands with Lat Pulldown, an all-in-one station offering over 50 exercises, including lat pulldowns and adjustable barbell settings, ideal for any fitness level.
Squat Stands
Squat stands represent the most basic and space-efficient option, consisting of two independent uprights that hold the barbell. These portable units can be easily moved and stored when not in use, making them ideal for beginners or those with severe space constraints.
While squat stands are budget-friendly and space-efficient, they offer limited safety features compared to larger racks. The independent nature of the uprights means they’re less stable under heavy loads, and most don’t include safety bars. However, for basic strength training and those just starting their fitness journey, squat stands provide an accessible entry point into barbell training.
For a compact yet sturdy solution, check out the Adjustable Squat Rack Barbell Bench Press Stands Pair, perfect for home gyms with limited space while still supporting up to 200kg for bench presses and squats.
Wall-Mounted Racks
Wall-mounted racks maximize floor space efficiency by attaching directly to wall studs or dedicated wall reinforcements. Many wall-mounted options feature folding designs that allow the rack to be stored flat against the wall when not in use, making them perfect for garages or multi-purpose rooms.
These racks require proper wall mounting to handle the forces generated during lifting, but when installed correctly, they can support substantial weight while freeing up valuable floor space. Some wall-mounted systems can even rival full power racks in terms of exercise versatility while maintaining a minimal footprint.
Multi-Station Racks
Multi-station racks combine squat rack functionality with additional exercise stations like lat pulldowns, cable systems, or dedicated bench press areas. These comprehensive units are designed to provide a complete gym experience in a single piece of equipment.
While multi-station racks maximize exercise variety, they typically require significant space and represent a substantial investment. They’re best suited for dedicated home gyms where space allows for a larger equipment footprint and where the additional features will be regularly utilized.
Key Features to Consider When Choosing a Squat Rack
Selecting the right rack requires careful consideration of several technical features that directly impact safety, versatility, and long-term durability. Understanding these features will help you make an informed decision that serves your training needs for years to come.
Weight Capacity Ratings
Weight capacity is perhaps the most critical specification to consider when choosing any squat rack. This rating indicates the maximum load the rack can safely handle, including not just the weight you’re lifting but also the dynamic forces generated during exercise.
Entry-level home racks typically support 300-600 pounds, which suits most beginners and intermediate lifters. However, if you’re serious about progression or already lifting heavy weights, invest in a rack rated for at least 1,000 pounds to accommodate future strength gains. Commercial-grade racks often exceed 1,500 pounds capacity, providing a substantial safety margin for even the strongest lifters.
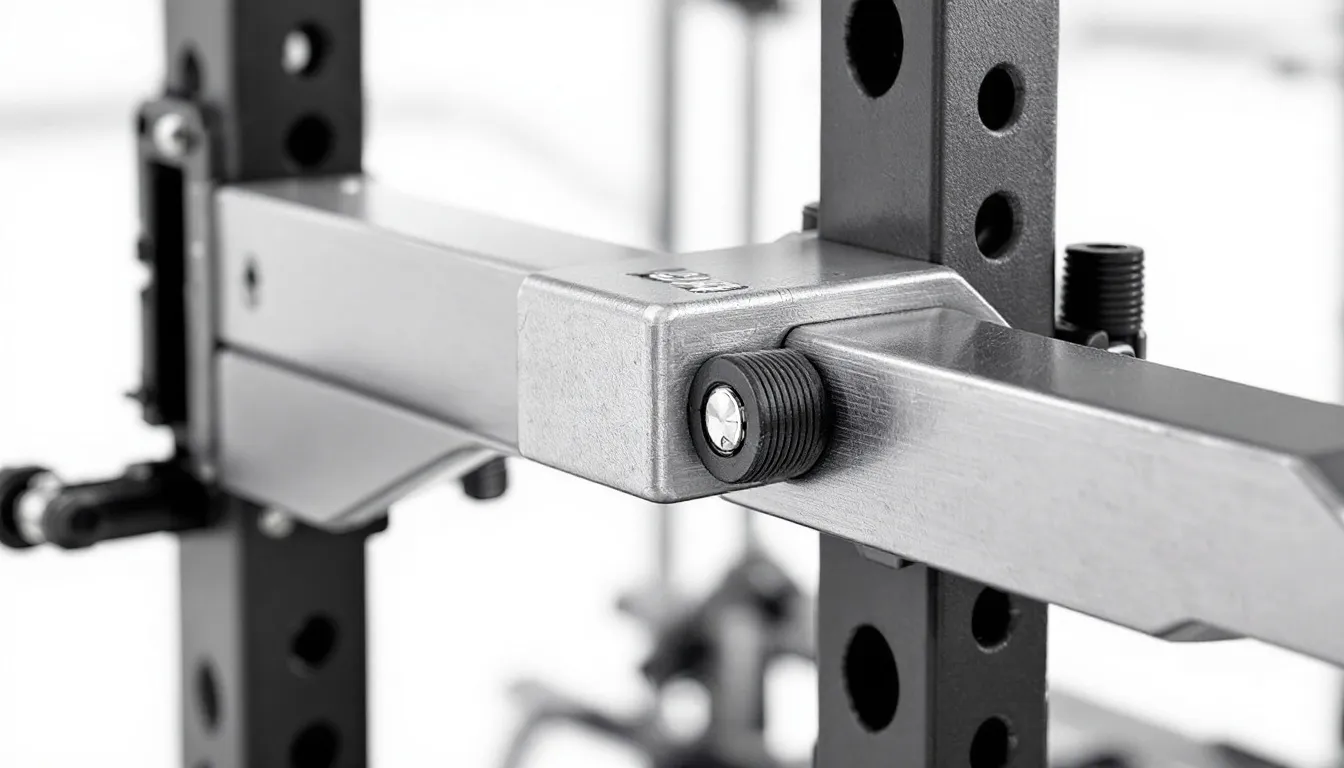
Adjustability and Hole Spacing
The adjustability of j hooks and safety bars determines how precisely you can customize the rack for different exercises and user heights. Most quality racks feature laser-cut holes along the uprights, typically spaced at 1-inch or 2-inch intervals.
Closer hole spacing provides more precise adjustments but may increase manufacturing costs. For most users, 2-inch spacing offers sufficient adjustability while 1-inch spacing provides optimal customization for varying exercise requirements and multiple users of different heights.
Steel Gauge and Construction Quality
The gauge (thickness) of steel used in rack construction directly impacts durability and stability. Heavier gauge steel (lower numbers indicate thicker steel) provides better stability and longevity but increases the overall weight and cost of the unit.
Look for racks constructed from 11-gauge steel or thicker for the main frame, with quality welds and proper reinforcement at stress points. The frame should feel solid without excessive flex or movement during use, ensuring safe operation under heavy loads.
Protective Features
Quality racks include protective features that preserve both the equipment and your barbells. J hooks should feature plastic or urethane protective guards that prevent metal-on-metal contact, protecting your barbell’s knurling and reducing noise during racking.
Powder coating or other protective finishes help prevent rust and corrosion, particularly important in humid environments like garages or basements. Look for thick, even coating application that can withstand the inevitable contact with weights and barbells.
Pull-Up Bar Integration
Most modern squat racks include integrated pull-up bars, adding significant exercise versatility without requiring additional equipment. Consider the style of pull-up bar – some feature multiple grip positions while others offer a single straight bar.
Ensure the pull-up bar can support your body weight plus any additional resistance you might add in the future. The bar should be positioned high enough to allow full range of motion without your feet touching the ground at the bottom of the movement.
Attachment Compatibility
Consider the rack’s compatibility with accessories and attachments that can expand its functionality. Common attachments include dip bars, landmine attachments, weight storage horns, and cable systems.
Look for racks with standardized hole patterns and mounting systems that accommodate a wide range of accessories. This feature becomes increasingly important as your training evolves and you seek to add variety to your workouts.
Essential Safety Features
Safety should be the top priority when selecting and using any squat rack. The right safety features enable confident training with heavy weights while protecting you from injury during failed lifts or form breakdowns.
Safety Bars and Spotter Arms
Safety bars, also called spotter arms, are adjustable horizontal bars that can catch the barbell if you fail a lift. These mechanical spotters are essential for solo training, allowing you to push your limits without fear of being trapped under a heavy weight.
Position safety bars just below your lowest point for each exercise – typically 2-3 inches below your chest for bench presses or just below your lowest squat position. This positioning provides protection while allowing full range of motion for successful lifts. Quality safety bars should be able to handle the full weight capacity of the rack and feature protective padding to prevent damage to dropped barbells.
Proper Height Adjustment
Correct height adjustment of j hooks and safety features is crucial for both effective training and injury prevention. J hooks should be positioned so you can unrack the weight with slightly bent knees, allowing you to stand fully upright before beginning your lift.
For squats, position j hooks at about chest height, enabling easy unracking without requiring excessive tiptoeing or excessive lowering. For bench presses, j hooks should allow you to unrack the bar with arms nearly extended but not fully locked out.
Stable Base Design
A stable base prevents tipping and movement during use, particularly important when performing exercises that create lateral forces like rack pulls or using band resistance. Look for racks with wide base designs or the option to add weight storage that lowers the center of gravity.
Some racks include the option for floor anchoring, which provides ultimate stability for heavy lifting or commercial environments. While not necessary for most home applications, floor anchoring can provide additional peace of mind for those lifting extremely heavy weights.
Band Pegs and Storage Features
Integrated band pegs allow for accommodating resistance training, where bands add variable resistance throughout the range of motion. These small features can significantly expand training variety and are particularly valuable for strength development at specific joint angles.
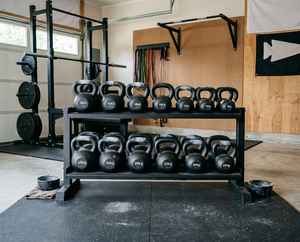
Storage horns and weight plate storage keep your training area organized while adding stability to the rack. Properly loaded weight storage can help anchor the rack and prevent unwanted movement during training sessions.
Exercises You Can Perform with a Squat Rack
The versatility of a quality squat rack extends far beyond its namesake exercise. Understanding the full range of movements possible with your rack will help you maximize your investment and create comprehensive workout routines that target every muscle group.
Primary Squat Variations
The squat rack enables all major squat variations, from back squats that target the posterior chain to front squats that emphasize quadriceps and core stability. Overhead squats can be performed by experienced lifters to develop mobility and stability throughout the entire kinetic chain.
Box squats, performed by squatting back to a box or bench positioned within the rack, help develop posterior chain strength and teach proper squatting mechanics. The safety bars can be positioned to support partial range squats, useful for working through sticking points or accommodating injuries.
Bench Press Integration
When combined with an adjustable bench, your squat rack becomes a complete bench press station. The safety bars provide crucial protection during solo bench pressing, catching the bar if you fail a rep and preventing potentially dangerous situations.
Incline and decline bench presses can also be performed by adjusting the bench angle while maintaining the safety benefits of the rack’s protection. This combination eliminates the need for a separate bench press station while providing superior safety features.
Rack Pulls and Partial Deadlifts
By adjusting the safety bars to various heights, you can perform rack pulls and partial deadlifts that target the upper portion of the deadlift movement. These exercises allow you to work with heavier weights than full deadlifts while focusing on specific portions of the lift.
Rack pulls are particularly valuable for developing lockout strength and can be adjusted to work through individual sticking points. They also provide a safer alternative to deadlifts for those with lower back issues or mobility limitations.
Overhead Press Movements
Standing overhead presses performed in a rack provide safety benefits through adjustable j hooks and safety bars. The rack allows you to start the movement at the optimal height while providing protection if you fail to complete a rep.
Push presses and push jerks can also be performed safely within the rack environment, allowing you to work on explosive overhead movements without worrying about dropping the weight on failed attempts.
Pull-Ups and Upper Body Pulling
Most squat racks include integrated pull-up bars, enabling various upper body pulling exercises. Standard pull-ups, chin-ups, and wide-grip variations can all be performed, providing comprehensive upper body development.
Barbell rows can be performed using the j hooks to position the bar at the appropriate height for bent-over rows, allowing you to maintain proper form without having to deadlift the weight from the floor each set.
Functional Training Movements
With appropriate attachments, squat racks can accommodate functional training movements like landmine exercises, suspension trainer anchor points, and resistance band training. These additions transform your rack into a comprehensive functional fitness station.
The stable frame of a quality rack provides an ideal anchor point for various unconventional training methods, expanding your exercise options well beyond traditional barbell movements.
Space Requirements and Setup Considerations
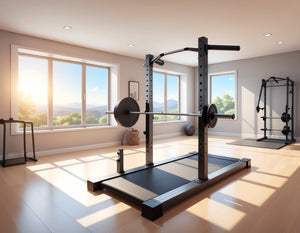
Proper planning of space requirements ensures your squat rack fits comfortably in your available area while allowing safe exercise performance. Understanding these requirements before purchase prevents costly mistakes and ensures optimal functionality.
Minimum Ceiling Height Requirements
Ceiling height is often the limiting factor in rack selection, particularly for overhead movements and pull-ups. Most standard racks require a minimum ceiling height of 8 feet, though 9 feet provides more comfortable clearance for taller users.
Consider your own height plus arm reach when performing overhead movements like presses and pull-ups. Add at least 12 inches above your maximum reach to ensure comfortable movement without the risk of hitting the ceiling during exercise.
Floor Space Requirements
Different rack types require varying amounts of floor space. Basic squat stands may only need a 4x6 foot area, while full power racks typically require 6x8 feet or more for safe operation.
Remember to account for barbell length when calculating space needs. A standard Olympic barbell is 7 feet long, so you’ll need additional space on each side of the rack for plate loading and safe clearance. Plan for at least 8 feet of total width and 10 feet of depth for comfortable use.
Clearance for Safe Exercise Performance
Adequate clearance around the rack is essential for safe exercise performance and emergency situations. Plan for at least 2-3 feet of clearance on all sides of the rack to allow for proper movement patterns and safe exit from failed lifts.
Consider the swing pattern of exercises like good mornings or bent-over rows when planning clearance. Additionally, ensure adequate space for spotters if you plan to train with partners occasionally.
Flooring Considerations
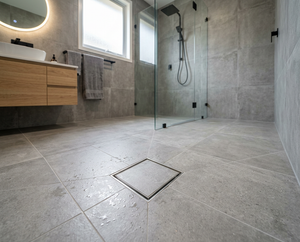
Proper flooring protects both your floors and your equipment while providing stable footing during lifts. Rubber mats or dedicated gym flooring help absorb impact from dropped weights and prevent slipping during exercises.
Consider the weight of loaded barbells when selecting flooring – a fully loaded barbell can weigh several hundred pounds and may damage inadequate flooring. Interlocking rubber tiles or platform-style flooring provide excellent protection and can be easily installed in most spaces.
Assembly and Installation Requirements
Most home squat racks require assembly, which can be time-consuming and may require basic tools and mechanical aptitude. Plan for several hours of assembly time and ensure you have the necessary tools before beginning.
Wall-mounted racks require proper anchoring to wall studs or dedicated reinforcement. Consider professional installation for wall-mounted units to ensure proper load distribution and safety. Some units may also benefit from floor anchoring for maximum stability.

Home Gym vs Commercial Grade Squat Racks
Understanding the differences between home gym equipment and commercial-grade racks helps you make an informed decision based on your intended use, budget, and quality expectations.
Construction Quality and Materials
Commercial-grade racks are built to withstand constant use by multiple users with varying levels of experience and care. They typically feature heavier gauge steel, more robust welds, and enhanced protective finishes designed to maintain appearance and function under heavy use.
Home gym racks, while often built to high standards, may use lighter gauge materials and simplified construction to achieve more accessible price points. However, for typical home use patterns, quality home racks provide excellent durability and performance for decades of regular training.
Weight Capacity Differences
Commercial racks often feature weight capacities exceeding 1,500 pounds, designed to handle the heaviest lifters and provide substantial safety margins under constant use. This over-engineering ensures safety even when equipment is used improperly or beyond normal parameters.
Home gym racks typically range from 300-1,000 pounds capacity, which suits the vast majority of home users. Consider your current and projected future strength levels when selecting capacity – most home users never approach the limits of quality home racks.
Price Range and Value Considerations
Commercial equipment commands premium pricing due to enhanced materials, construction quality, and compliance with commercial safety standards. Professional-grade racks can cost $3,000-$10,000 or more, reflecting their specialized design and manufacturing requirements.
Home gym racks offer excellent value, typically ranging from $200-$1,500 depending on features and quality level. When evaluated against gym membership costs, even premium home racks can pay for themselves within 1-2 years while providing the convenience of home training.
Warranty Coverage and Expected Lifespan
Commercial equipment often includes comprehensive warranties covering both parts and labor, reflecting manufacturer confidence in construction quality and the need to minimize downtime in commercial settings. Professional equipment is designed for 10-20 years of heavy commercial use.
Quality home racks typically include 1-5 year warranties on major components and can last decades with proper care and maintenance. The lower usage frequency in home environments significantly extends equipment lifespan compared to commercial applications.
Frequency of Use Considerations
Commercial racks must handle multiple users daily, often with improper use and minimal maintenance. This demanding environment requires robust construction and materials that can withstand abuse while maintaining safety standards.
Home racks typically see use a few times per week by a single user or family, significantly reducing wear and stress. This usage pattern allows home equipment to perform excellently for many years while requiring minimal maintenance beyond basic cleaning and periodic inspection.
Budget Considerations and Value
Making a smart investment in squat rack equipment requires balancing immediate budget constraints with long-term value and functionality. Understanding the price ranges and value propositions of different options helps ensure you get the best return on your fitness investment.
Entry-Level Options for Beginners
For those beginning their fitness journey or working with tight budgets, entry-level squat stands and basic racks provide excellent value. These options typically range from $200-$500 and offer essential functionality for basic strength training.
Entry-level equipment may have lower weight capacities and fewer features, but quality budget options can safely support most beginners through their first years of training. Focus on stable construction and adequate safety features rather than premium materials or extensive accessories.
Mid-Range Racks for Optimal Value
Mid-range racks, typically priced between $500-$1,200, often provide the best balance of features, quality, and cost for serious home gym builders. These units usually include enhanced safety features, better construction quality, and compatibility with various accessories.
This price range often includes quality half racks and entry-level power cages that can serve most users throughout their entire lifting careers. The additional investment in mid-range equipment typically pays dividends in durability, safety, and exercise versatility.
Premium Models with Advanced Features
Premium racks ranging from $1,200-$3,000 or more offer advanced features like commercial-grade construction, extensive accessory compatibility, and enhanced adjustability. These units often include features like integrated lat pulldowns, cable systems, or competition-grade specifications.
While premium features enhance training versatility, evaluate whether you’ll actually use advanced functions before investing in top-tier equipment. Sometimes, a quality mid-range rack plus separate accessories provides better value than an all-in-one premium unit.
Long-Term Investment Value
When evaluating cost, consider the long-term value compared to gym memberships and other fitness expenses. A quality squat rack can provide decades of service, potentially saving thousands in gym fees while offering the convenience of home training.
Calculate the break-even point by comparing equipment cost to annual gym membership fees. Most quality home racks pay for themselves within 1-3 years while providing superior convenience and availability compared to commercial gym access.
Additional Equipment Costs
Budget for essential accessories beyond the rack itself, including barbells, weight plates, and safety equipment. A complete setup typically requires an additional $500-$1,500 in plates, barbells, and benches to maximize rack functionality.
Consider these additional costs when setting your overall budget to avoid surprises. Sometimes, purchasing complete packages or gradually building your equipment collection can help manage costs while ensuring compatibility between components.
Maintenance and Care
Proper maintenance extends equipment life, ensures continued safety, and protects your investment. Understanding basic maintenance requirements helps you keep your squat rack in optimal condition for years of reliable service.
Regular Inspection Procedures
Perform monthly inspections of all bolts, connections, and moving parts to ensure everything remains tight and properly aligned. Look for signs of wear, loosening, or damage that could compromise safety during use.
Check j hooks and safety bars for proper fit and smooth operation. These components experience the most stress during use and should move smoothly while maintaining secure positioning. Replace any worn or damaged components immediately to maintain safety standards.
Cleaning and Surface Care
Regular cleaning maintains both appearance and function while preventing corrosion and wear. Use appropriate cleaners for your rack’s finish – mild soap and water work well for most powder-coated surfaces, while stainless steel may require specialized cleaners.
Clean up spills, sweat, and chalk immediately to prevent staining or corrosion. In humid environments, consider using moisture absorbers or dehumidifiers to minimize rust risk on exposed metal components.
Lubrication Requirements
Moving parts like j hook sleeves and adjustment mechanisms benefit from periodic lubrication to ensure smooth operation and prevent premature wear. Use appropriate lubricants recommended by the manufacturer – typically light machine oil or white lithium grease.
Avoid over-lubrication, which can attract dirt and debris. Apply lubricants sparingly and wipe away excess to maintain clean operation. Focus on pivot points, sliding surfaces, and adjustment mechanisms that see regular use.
Storage and Protection
If your rack is stored in a garage or basement, consider additional protection from moisture and temperature fluctuations. Cover unused racks during extended periods of non-use to prevent dust accumulation and protect finishes.
Store accessories properly to prevent damage and maintain organization. Weight storage horns keep plates organized while preventing damage to both plates and flooring. Proper storage also prevents tripping hazards and maintains a professional appearance.
Signs Requiring Professional Attention
Recognize when issues require professional attention or component replacement. Cracked welds, bent components, or excessive wear require immediate attention to maintain safety standards.
If you notice unusual sounds, difficulty adjusting components, or any structural damage, discontinue use until issues are resolved. Contact the manufacturer or qualified technician for guidance on repairs or replacement needs.

Common Mistakes to Avoid
Learning from common mistakes can save money, prevent injury, and ensure you get maximum value from your squat rack investment. Understanding these pitfalls helps you make better decisions and use your equipment safely and effectively.
Inadequate Weight Capacity Planning
One of the most common mistakes is choosing a rack with insufficient weight capacity for future progression. Many beginners underestimate how quickly they’ll advance and find themselves limited by equipment capacity within months of purchase.
Always choose equipment rated well above your current lifting capacity. A good rule of thumb is selecting a rack rated for at least double your current maximum lift to accommodate years of progression and provide adequate safety margins.
Ignoring Space Requirements
Failing to properly measure available space leads to cramped training conditions or equipment that doesn’t fit properly. Remember to account for ceiling height, barbell length, and movement clearance when planning your setup.
Consider not just the rack footprint but also the space needed for exercise performance and safety. Inadequate clearance can limit exercise selection and create dangerous conditions during training sessions.
Improper Safety Bar Setup
Many users either skip safety bar setup entirely or position them incorrectly, compromising the primary safety benefit of rack training. Safety bars should be positioned just below your lowest point for each exercise to provide protection without interfering with proper form.
Take time to adjust safety bars for each exercise and user. Proper positioning requires a few extra minutes but provides crucial protection that justifies the entire investment in rack equipment.
Poor Rack Positioning
Positioning your rack too close to walls, other equipment, or obstacles limits exercise selection and creates safety hazards. Ensure adequate clearance on all sides and consider traffic patterns in your training space.
Also consider factors like natural lighting, ventilation, and access to other equipment when positioning your rack. A well-positioned rack enhances the entire training experience and improves long-term adherence to your fitness program.
Neglecting Floor Protection
Failing to protect flooring from weight impact and rack placement can result in expensive damage and potential safety issues from unstable surfaces. Invest in appropriate flooring or protective mats to preserve your floors and provide stable footing.
Quality gym flooring also reduces noise transmission to other areas of your home and provides better traction during lifts. Consider flooring as an essential component of your gym setup rather than an optional upgrade.
Rushing the Decision Process
Taking time to research options, read reviews, and understand your specific needs prevents costly mistakes and ensures satisfaction with your purchase. Compare features, warranties, and customer service before making a final decision.
Consider visiting showrooms or trying different rack types if possible. The investment in time upfront saves money and frustration later while ensuring you choose equipment that truly serves your workout needs and fitness goals.
Investing in the right squat rack transforms your strength training by providing safety, versatility, and the foundation for progressive muscle development. Whether you choose a basic stand for your spare room or a full power cage for a dedicated home gym, the key is matching the equipment to your specific needs, space, and budget.
Remember that a quality squat rack is a long-term investment in your health and fitness journey. Take time to evaluate your options carefully, prioritize safety features, and choose equipment that will grow with your strength and training goals. With proper selection and care, your squat rack will provide decades of reliable service, supporting your quest to build strength and achieve your fitness aspirations.
 Tags:
Tags: