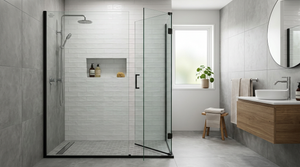
1300 760 441
 cs@factoryfast.com.au
Corner Shower Screens vs Walk-In Shower Panels: Which Layout Is Right for Your Bathroom?
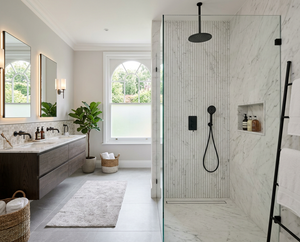

A shower can occupy the same measured area yet feel completely different depending on how the glass is arranged. A corner enclosure defines the shower on two sides and usually adds a door. A walk-in design uses a fixed panel to interrupt splashes while leaving an open entry. That difference affects much more than appearance: it changes access, water control, circulation, cleaning and installation planning.
The right choice begins with the room rather than the glass. Before browsing the wider range of shower screens, identify where the shower will sit, which direction people approach it from and what must remain clear outside it. A compact ensuite may benefit from the containment of a corner screen, while a longer shower zone may have enough depth for an open panel to work properly.
The Short Answer: Enclosure or Openness?
Choose a corner shower screen when the priority is creating a defined enclosure with stronger splash containment. This layout generally suits a shower placed where two bathroom walls meet. It can make productive use of a corner while separating the wet zone from a nearby vanity, toilet, doorway or storage unit.
Choose a walk-in shower panel when the room has enough shower depth to leave an open entry without allowing excessive spray into the surrounding area. A fixed panel has no door to swing or slide, so it can create a visually lighter bathroom and a simple path into the shower.
Neither format is automatically better for small bathrooms. A compact corner enclosure may control water more effectively within a tight footprint, but its door movement and hardware can crowd the room. A fixed panel removes the door yet may require a longer wet zone to manage splashing. The best option is the one that fits both the floor plan and the way the shower will be used.
How the Two Shower Layouts Work
Understanding the physical layout makes the comparison much clearer.
Corner Shower Screens Create a Defined Footprint
A corner configuration uses the room’s two existing walls and adds glass along the exposed sides. Depending on the model, the glass may include fixed panels, hinge panels, one or two doors, brackets or channels. Square and rectangular footprints allow buyers to match the enclosure to the available floor area.
The main benefit is definition. The enclosure establishes a clear boundary between the shower and the dry part of the bathroom. This can be valuable when towels, cabinetry or a bathroom entrance sit close to the shower.
Factory Fast’s corner shower screen collection includes compact 900 mm configurations as well as larger rectangular and square options. The correct footprint depends on the usable showering area, the door opening and the position of surrounding fixtures.
Walk-In Panels Divide Rather Than Enclose
A walk-in shower panel is normally a single fixed sheet of glass secured to the wall and floor with brackets or channels. One side remains open for entry. There are no door hinges, handles or sliding tracks to operate.
This arrangement works best when the panel is wide enough to intercept the main spray and the shower continues far enough behind it. The open entry should also face away from the strongest water flow where the layout permits. A panel that looks generous on a plan can still perform poorly if the shower head sends water directly towards the opening.
The shower panels collection is the more relevant starting point when the goal is an open, fixed-glass layout rather than a complete enclosure.
Compare Entry Space and Movement Around the Bathroom
The shower entrance must work with the whole room, not simply fit inside the shower footprint.
Check the Full Door Arc on a Corner Screen
A hinged corner door requires a clear path. Measure the complete arc rather than checking only the opening at its widest point. The door should not strike a vanity, toilet, towel rail or bathroom door. You also need enough standing room outside the enclosure to open it without stepping awkwardly around another fixture.
Some hinges allow inward and outward movement, but this should still be checked against the exact product. Inward opening can preserve circulation outside the shower, while outward opening may feel more natural when exiting. The position of taps, shelves and other fittings inside the enclosure can limit inward travel.
A sliding or double-door corner configuration can be worth comparing when a conventional door arc is the main obstacle. Double doors may create a more central entry, although they introduce additional hinges, handles and glass junctions.
Allow a Comfortable Open Entry Beside a Fixed Panel
A walk-in layout avoids a moving door, but the gap must remain practical. A narrow opening may be inconvenient for daily access, while an overly wide one can weaken splash control.
Look at the approach path as well. An opening that faces the bathroom doorway may feel direct and spacious. An entry squeezed between the panel edge and a vanity may be technically usable but frustrating when carrying towels, helping a child or cleaning the shower.
Households planning for changing mobility should consider the complete route from the bathroom entrance into the shower. Check floor transitions, entry width and the position of tapware rather than relying on the absence of a door alone.
Which Option Controls Water Better?
A corner enclosure normally provides the more predictable water boundary. Glass surrounds the exposed sides, while the door and seals reduce the amount of spray escaping into the room. This can suit busy family bathrooms, compact ensuites and layouts where the dry floor area begins immediately beside the shower.
A walk-in panel controls spray rather than closing off the entire wet zone. Its effectiveness depends on panel width, shower depth, shower-head direction and water pressure. The position of the open entry matters just as much as the dimensions of the glass.
Corner Screens Suit Shorter Wet Zones
When the shower cannot extend far into the room, an enclosure can compensate by placing a physical barrier around more of the perimeter. This is useful when the toilet or vanity sits close to the shower edge and needs protection from routine splashes.
Containment should not be confused with correcting a poorly planned floor. The floor fall, drainage position and sealed junctions still need to suit the selected layout. A screen manages water above the floor; it cannot resolve water moving in the wrong direction below it.
Walk-In Panels Need Length Behind the Glass
An open shower should provide enough distance between the shower head and the entry. A wider fixed panel intercepts more spray, but increasing glass width also reduces the open passage beside it. Buyers therefore need to balance coverage with access.
Shower-head placement can improve the result. Directing the spray towards a tiled wall or deeper into the shower is generally more practical than aiming it towards the open side. A ceiling-mounted or wide spray pattern should be assessed particularly carefully because water may travel beyond the most obvious line.
Measure the Real Installation Area
Product names often use convenient overall sizes, but those labels are only a starting point. Finished walls, tile thickness, channels, brackets, seals and glass-panel divisions all affect fit.
Measuring for a Corner Enclosure
Measure both legs of the corner at several heights. Record the smallest finished measurement if the walls are not perfectly parallel. Then identify the dimensions of each supplied glass component rather than assuming that the named overall size describes one continuous panel.
The verified in-stock 110 x 90 cm frameless corner shower screen with black hardware illustrates why the component breakdown matters. Its 1100 mm side combines a 440 x 2000 mm hinge panel with a 650 x 1990 mm door, while the return panel measures 900 x 2000 mm. It uses 10 mm toughened glass and dual-action hinge hardware.
Mark those dimensions on the floor and walls. Add the complete door arc, the standing position outside the enclosure and the reach to the handle. This reveals conflicts that a simple 1100 x 900 mm rectangle may hide.
Measuring for a Walk-In Panel
For a fixed panel, measure the planned glass line from the finished wall. Confirm panel width and height, then calculate the remaining open entry. The panel must be considered alongside the total shower-zone depth rather than as an isolated piece of glass.
The verified in-stock 90 x 200 cm fixed shower panel with gunmetal channels uses 10 mm toughened glass. Its anodised aluminium wall and floor channels are supplied longer than the relevant glass edges and are cut to size during installation where applicable. This detail affects preparation, tools and the finished hardware lines.
Also check whether skirting, wall projections, floor joints or changes in tile level interfere with the channel or bracket position. Toughened glass cannot be trimmed on site to correct a measurement error.
Glass and Hardware Change the Buying Decision
Two frameless-looking installations can require quite different hardware. The visual result matters, but the fixing method also affects wall preparation, adjustment, cleaning and what is included in the order.
Brackets Emphasise the Glass
Individual brackets minimise the amount of hardware running along the glass edge. They can create a particularly open appearance, but their fixing positions must align with suitable surfaces. The installer also needs to manage the junctions between glass, wall and floor correctly.
Corner screens add door hinges and handles to that hardware plan. Check the specified glass thickness, hinge compatibility and maximum supported door weight as one system. Choosing pieces independently by colour is not enough.
Channels Create Continuous Support Lines
A wall channel holds the glass along a longer edge and may offer a small amount of installation tolerance, depending on the design. A floor channel creates a continuous line beneath the panel. This can suit buyers who prefer a visually defined base or want fewer individual brackets.
Channels must still be cut and installed accurately. Their length, width, material and finish should be checked against the product description before work begins. Where the wall and floor channels meet, careful alignment is important to avoid a visibly uneven junction.
Coordinate the Finish Across the Bathroom
Black, chrome, gunmetal, gold, nickel and white hardware can each change how prominent the screen appears. A dark finish outlines the glass and turns the screen into a stronger visual feature. A finish closer to the tapware can make the bathroom feel more coordinated.
Compare finish names carefully rather than assuming that similarly described colours will be identical. Lighting, surrounding tiles and the texture of a brushed or matte surface all influence how the hardware appears in the completed room.
Cleaning and Everyday Ownership
A fixed walk-in panel is usually the simpler format mechanically. With no door hinges or handles, there are fewer moving components to inspect and fewer junctions around the entry. The broad glass face is easy to reach, although the open shower area may expose more of the surrounding floor and wall to moisture.
A corner shower screen contains more of the daily spray, but its hinge edges, door seals, handles and glass intersections add cleaning points. Double-door models introduce even more joins. Buyers who value containment may consider that worthwhile, especially when the rest of the bathroom needs to remain dry.
Whichever layout you choose, check access to both sides of every glass panel. A narrow gap between a fixed return panel and nearby cabinetry can collect residue while being difficult to reach. Hardware with exposed corners or close wall spacing may also require more detailed cleaning than its showroom appearance suggests.
The position of bathroom ventilation and towels deserves attention too. An enclosed screen can retain more steam within the shower immediately after use, while an open arrangement allows air to move more freely. Neither layout removes the need to dry frequently wet edges and keep the room ventilated.
Compare Purchase Price With the Complete Project Cost
A single fixed panel generally uses fewer glass pieces and less operating hardware than a corner enclosure. The currently verified 900 x 2000 mm walk-in example is listed at $319.95, while the 1100 x 900 mm corner configuration is listed at $704.95. Prices can change, and these examples should not be treated as a universal category price range.
The products are also not like-for-like packages. The corner option includes a door, hinge panel, return panel, hinges, handle and mounting hardware. The fixed option consists of one panel with wall and floor channels. The price difference therefore reflects a major difference in configuration and included components.
Budget beyond the glass. Relevant costs can include delivery, installation, substrate preparation, sealing materials, drainage work and changes to tiles or tapware. An inexpensive panel is not the lower-cost project if creating sufficient shower depth requires moving other bathroom elements.
Check the package contents before ordering. Product images may illustrate optional accessories or alternative configurations, so use the written inclusion list as the purchasing reference.
Installation Constraints to Resolve Before Ordering
Both layouts rely on accurate fixing surfaces. Confirm what sits behind the finished wall where hinges, brackets or channels will be installed. A heavy door places different demands on its fixing point than a stationary panel.
A corner screen also requires the two glass sides to meet in the intended position. Wall alignment, floor level and the relationship between the hinge panel and door all influence whether the enclosure operates cleanly. If the door is expected to open both ways, allow for internal fittings as well as external fixtures.
A walk-in panel needs careful planning at its exposed edge. Wider or taller panels may use a stabilising pole or a particular bracket arrangement. Do not assume that support hardware shown on another size is included with the version being considered.
Installation should be planned before final tiling where possible. That gives the renovator or installer an opportunity to confirm fixing locations, floor treatment, panel alignment and plumbing positions while changes are still manageable.
Corner Shower Screen or Walk-In Panel: Make the Final Choice
Choose a corner shower screen when:
- The shower must fit into a compact, clearly defined footprint.
- A vanity, toilet or doorway sits close to the wet zone.
- Stronger splash containment is a priority.
- The room can accommodate the selected door movement.
- You prefer the privacy and definition of a complete enclosure.
Choose a walk-in shower panel when:
- The shower zone has enough depth to manage spray before it reaches the opening.
- You want an open entry without hinges, handles or tracks.
- A fixed glass divider suits the bathroom’s circulation path.
- The shower head can be directed away from the entrance.
- Simple mechanical upkeep is more important than maximum enclosure.
If the room falls between these two profiles, start with water movement. Plot the shower-head position, spray direction, drain and open entry first. Then test whether the remaining floor area stays practical for someone using the vanity, opening cabinets and moving through the bathroom.
Before ordering, mark the proposed glass edges on the floor with removable tape and place a vertical strip on the wall at the exposed panel edge. Photograph the mock-up from the doorway and from the vanity. Those two views can reveal whether a corner enclosure will dominate the sightline or whether a walk-in panel leaves the shower opening too exposed.
Frequently Asked Questions
Do walk-in shower panels let water escape?
A walk-in panel can allow more water beyond the shower when the panel is too narrow, the wet zone is too short or the spray faces the opening. Position the shower head deeper inside the space and measure the distance to the entrance. If nearby cabinetry begins immediately outside the shower, a corner enclosure may provide more dependable containment.
Does a corner shower screen need space for the door to open?
A hinged corner shower screen needs clearance for its full door arc unless the selected design opens only inward or uses sliding entry. Check the vanity, toilet, towel rail and bathroom door at every point along that arc. Also confirm that taps and shelves inside the enclosure will not obstruct an inward-opening door.
Can a fixed glass panel be installed directly onto a tiled floor?
Some fixed panels are designed for installation on a tiled floor using brackets or a floor channel, but the exact product instructions and fixing requirements control the installation. Confirm the floor condition, drainage layout and supplied hardware before ordering. The finished tile position should be used for measurements because earlier structural dimensions may not reflect the final opening.
Is a 900 mm shower panel wide enough for a walk-in shower?
A 900 mm panel may suit some walk-in layouts, but panel width alone cannot determine splash control. Consider the total shower depth, open-entry width, shower-head position and spray direction. Mark the 900 mm glass line on the floor, then check whether the remaining entrance is comfortable and whether water is likely to travel around the exposed edge.
Are corner shower screens harder to clean than walk-in panels?
Corner screens generally have more hinges, handles, seals and glass junctions to clean than a single fixed panel. In return, they can keep more spray within the enclosure. Check whether both sides of each panel are reachable and whether nearby cabinetry creates narrow gaps before choosing purely on appearance.
What is the most common regret when choosing between these layouts?
The most common practical regret is prioritising an open look without testing water movement and entry space. A walk-in panel may leave the floor wetter than expected, while a corner screen can feel restrictive if its door conflicts with another fixture. A taped full-size floor outline helps expose both problems before the glass is ordered.
 Tags:
Tags: