1300 760 441
 cs@factoryfast.com.au
Closet Organisers Buyer Guide: Build a Wardrobe That Stays Organised
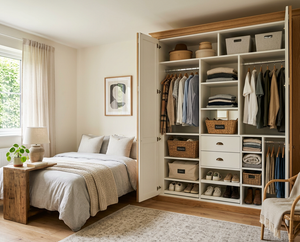

A wardrobe can have plenty of space and still be frustrating to use. Shirts become compressed on the rail, shoes spread across the floor, folded clothes form unstable piles, and small accessories disappear behind larger items. The underlying problem is usually not a lack of storage. It is a mismatch between the available space, the organiser and the belongings placed inside it.
Effective closet organisers give each type of item a suitable position. Hanging garments need uninterrupted vertical clearance. Folded clothes benefit from shorter, separated stacks. Shoes need accessible storage with enough clearance for different styles. Seasonal clothing can move outside the everyday zone until it is needed again.
The right system therefore starts with what you own and how often you use it. This guide explains how to measure your wardrobe, compare organiser types and create a layout that remains practical after the initial tidy-up.
Why Wardrobes Become Disorganised
Most wardrobes are supplied with only a rail, a shelf or a basic combination of the two. That layout may provide volume, but it does not divide the space according to the size and frequency of the items being stored.
A long hanging section works for dresses and coats, yet it leaves unused space below shirts and folded trousers. Deep shelves can hold plenty, but items at the back become difficult to see. An open floor can accommodate shoes, although pairs soon overlap and obstruct access to hanging garments.
A useful wardrobe storage system converts these gaps into defined zones. The goal is not to fit the maximum possible number of items into every centimetre. It is to make frequently used clothing visible, reachable and straightforward to return after use.
Capacity and access are different problems
Adding more containers may increase nominal capacity while making the wardrobe harder to navigate. A stack of boxes, for example, can use vertical space efficiently but requires several boxes to be moved whenever something is needed from the bottom.
Before buying an organiser, ask two separate questions:
- Where can this item physically fit?
- Can I retrieve and replace it without moving unrelated belongings?
A successful layout answers both. Everyday clothing should have the easiest access, while occasional and seasonal pieces can occupy higher, lower or more enclosed positions.
Audit Your Clothing Before Choosing an Organiser
Buying storage before examining the contents often leads to the wrong balance of rails, shelves and compartments. Begin by removing the items from the problem area and grouping them according to how they should be stored.
Useful groups include long hanging garments, short hanging clothes, folded tops, trousers, knitwear, footwear, bags, belts, hats and off-season items. Keep awkward pieces such as tall boots or bulky jackets separate because they require more clearance than ordinary clothing.
Count storage units, not just individual items
A pile of shirts does not immediately tell you how much shelf space is required. Arrange the shirts into stacks of a height you can comfortably handle, then count the number of stacks. Apply the same method to towels, knitwear and folded trousers.
For footwear, count pairs by type. Flats and low-profile shoes can use closer vertical spacing than work boots or high-top footwear. Bags should be measured in their natural stored shape rather than flattened if crushing them would make daily access inconvenient.
Hanging clothes should be divided by length. Short garments can often sit above a shoe shelf or drawer unit, whereas coats and dresses need clear space beneath the rail.
Identify daily, weekly and seasonal items
The most accessible section should hold the clothes used during an ordinary week. Formal wear, travel items and off-season pieces do not need to occupy the same prime position.
This frequency test prevents a common mistake: giving bulky, rarely used belongings the easiest shelf simply because they were placed there first. Moving them to a high shelf, a sealed storage bag or another suitable area can make the main wardrobe feel larger without changing its dimensions.
Measure the Usable Space, Not the Empty Opening
Measure the internal width, depth and height of the area where the organiser will stand. Record the smallest measurement if walls, skirting boards or existing fittings make the space uneven.
Then check what occupies that space when the wardrobe is in use. Hinged doors need room to swing. Sliding doors may prevent full access to one side at a time. Drawers need forward clearance, and freestanding racks require enough surrounding room to assemble and position them.
Account for rails, shelves and door hardware
A unit that fits between the walls may still collide with a hanging rail, shelf support or door fitting. Measure from the floor to the underside of the rail and from the rear wall to the inside face of the closed door.
For an organiser placed beneath short hanging garments, measure the garments while they are on their usual hangers. Leave a practical gap so clothing does not rest on boxes or shelves below. This helps avoid creasing and makes the lower storage easier to use.
When considering an over-door solution, check the thickness and top clearance of the door, the position of nearby handles and whether the loaded organiser will affect closing. Product dimensions should be compared with these usable measurements, not merely the room’s overall size.
Match the Organiser to What It Will Hold
The most dependable closet storage solutions are selected by item type. One large unit may handle several groups, but each section should still have a defined job.
Hanging garments need the correct drop
Double hanging zones make efficient use of height when most clothes are shirts, skirts or folded trousers on hangers. A full-height section is more appropriate for dresses, coats and other long pieces.
Do not assess a rail by width alone. Heavy jackets place different demands on a rack than lightweight shirts. Where a product provides a load capacity, compare that figure with the intended contents and distribute the weight rather than concentrating it at one end.
If the room lacks built-in storage, the Portable Clothes Closet with eight shelves and two hanging sections offers a mixed layout within a 165 × 128 × 45 cm footprint. Its non-woven polyester canvas cover, reinforced metal pipe frame and separate folded-storage areas suit renters, spare rooms and bedrooms needing an enclosed freestanding option.
Folded clothing benefits from smaller compartments
Wide shelves encourage large stacks, and large stacks are difficult to maintain. Shorter compartments separate clothing by type and prevent one pile from disturbing another.
The 12 Cube Wire Grid Organiser uses iron wire mesh panels with ABS connectors. Each cube measures 35 × 35 × 35 cm, while the fully assembled configuration measures 110 × 36 × 148 cm. Each compartment has a listed maximum load of 9.9 kg.
This modular format is useful for folded tops, bags, hats and suitable storage containers because the cubes can be assigned by item type. The 36 cm assembled depth is also worth checking against the wardrobe’s internal depth and door clearance before purchase.
Shoes need visibility and appropriate clearance
Footwear stored in a heap consumes floor area and makes individual pairs harder to find. A dedicated shoe storage organiser separates pairs while keeping the rest of the wardrobe accessible.
Low shelves suit everyday shoes beneath short hanging garments. Tall vertical racks can make better use of a narrow section, while door-mounted formats preserve the floor for boxes or longer clothing. Browse the shoe racks collection by measuring both the available footprint and the tallest footwear that needs to fit.
The Over-the-Door Shoe Organiser consists of three interlocking sections, each designed to hold up to 12 pairs. Adjustable metal brackets support tool-free assembly. It is best suited to compatible doors with sufficient surrounding clearance and footwear that fits its open metal-bar layout.
Small accessories need boundaries
Socks, belts, scarves and jewellery are easily lost when mixed with larger garments. Shallow bins, divided drawers and compact cubes make these items visible without using a full shelf for each category.
Choose a container depth that allows the contents to be seen from the front. Deep boxes may be useful for bulk storage, but they are less convenient for small items used every morning. Labels can help when containers are opaque, although assigning one clear category to each space is more important than labelling an overcrowded mix.
Seasonal clothing belongs outside the prime zone
Bulky jackets, spare quilts and off-season clothing can occupy a disproportionate share of the everyday wardrobe. Moving clean, dry soft items into appropriately sized storage bags frees accessible shelves for current clothing.
The 10-pack of Jumbo Vacuum Storage Bags is designed for clothing, blankets and quilts and works with a standard vacuum cleaner. Store compressed bags on a stable shelf or another suitable dry surface where they will not be pierced or repeatedly moved.
Delicate garments or items that should retain loft may require a different storage method. Always consider the fabric and construction of the item before choosing compression simply because it saves space.
Compare Open, Covered and Modular Organisers
Each organiser format solves a different problem. Comparing them by access, flexibility and visual impact is more useful than choosing by appearance alone.
Open organisers prioritise visibility
Open rails and shelves let you see clothing immediately. They suit frequently used items and make it easier to notice when a category is becoming overcrowded. They can also fit into walk-in robes, spare-room walls and existing wardrobes without adding another set of doors.
The tradeoff is exposure. Garments remain visible from the room and may collect dust if they are rarely used. An open system works best when each shelf has a defined purpose and the owner is comfortable maintaining the display.
Covered organisers conceal mixed storage
A fabric-covered wardrobe can combine rails and shelves while keeping the contents visually contained. This format suits temporary bedrooms, rentals and rooms without built-in robes.
Check the balance between hanging and shelf space before buying. A covered organiser filled mainly with long garments will be less useful if most of its interior is divided into short compartments. Conversely, a rail-heavy design may waste space for someone who folds most clothing.
Modular systems adapt to changing needs
Modular wardrobe storage is useful when the available wall or closet shape does not suit a conventional cabinet. Separate compartments can be configured for folded clothing, bags and other appropriately sized items.
Flexibility does not remove the need to plan. Confirm the dimensions of the intended finished arrangement, the load limit of each compartment and how the connectors form the structure. Reconfiguring a system later is helpful, but it should begin with a stable layout that matches the present inventory.
For a broader project involving several rooms, the storage and organisation collection can help coordinate wardrobe storage with shelving, cabinets and other household storage formats.
Build the Layout Around Access Zones
Once the organiser type is chosen, position each category according to reach and frequency. A simple vertical layout usually has three access zones.
The middle zone, between comfortable waist and shoulder height, should hold the most frequently used clothing. Lower areas suit shoes, sturdy containers and folded items that are easy to lift. High shelves are better reserved for lighter seasonal belongings and infrequently accessed pieces.
Keep related decisions together
Store items where the choice is made. Belts are more useful near trousers than in a distant accessories box. Everyday shoes belong near the clothing worn with them. Bags can sit beside outerwear if they are normally selected at the same stage of getting dressed.
This reduces the number of separate wardrobe areas opened during a morning routine. It also makes returning items easier, which is the real test of whether an organising system will last.
Preserve a clear retrieval path
Every container should be removable without dismantling the section around it. Avoid placing daily-use boxes beneath heavy seasonal bags or positioning shoe storage where it blocks long garments.
If a wardrobe has sliding doors, divide everyday categories between the accessible halves rather than placing all frequently used pieces behind one moving panel. The best arrangement works with the door operation instead of treating it as an afterthought.
Choose Materials for the Intended Use
Material affects weight, cleaning, visibility and how the organiser feels in the room. Metal frames and wire panels provide an open structure and suit layouts where airflow and visibility are priorities. Confirm tube dimensions, connector construction and stated load limits where those specifications are supplied.
Fabric components keep the organiser lightweight and can conceal mixed contents. Check whether shelves are fabric, supported panels or another construction because this influences what they can hold without sagging. Place heavier belongings in sections designed for them rather than assuming every shelf has equal capacity.
Bamboo and timber-look storage can give an open wardrobe a more furniture-like appearance. These options suit visible bedrooms and entry areas, although their fixed shelf spacing may offer less flexibility than a modular grid.
Plastic connectors and panels keep many systems light and adaptable. They can work well for clothing and accessories when assembled according to the supplied instructions. Avoid loading them with dense items merely because there is unused space.
Plan Assembly and Ongoing Maintenance
Flat-pack and modular organisers need enough floor area for sorting components and completing assembly. Check the packaged access route as well as the finished dimensions, especially in apartments, narrow hallways or rooms with limited door clearance.
Read the supplied assembly guidance before loading the unit. Connectors should be fully seated, frames should stand level, and any included positioning or fixing instructions should be followed. Load limits apply to the completed product, so they should not be treated as optional targets during improvised configurations.
Maintain the system by category
Wardrobe organisation lasts longer when maintenance is tied to clear categories rather than a full-room clean-out. When the shirt section becomes tight, review shirts. When the shoe organiser is full, assess shoes before adding another rack.
Open organisers can be wiped or dusted during ordinary room cleaning. Fabric covers and storage bags should be cared for according to their product instructions. Only clean, dry clothing should be enclosed for extended storage, and seasonal items should be inspected when they are rotated back into use.
Avoid the Most Common Buying Mistakes
The first mistake is purchasing an organiser because it fits the wall while ignoring what must fit inside it. A narrow shelf may suit folded shirts but fail for handbags. A short rail may hold plenty of garments by number while leaving no drop for coats.
The second is using identical storage for every item. Shoes, knitwear, dresses and small accessories have different requirements. A mixed system often performs better than one repeated container type.
The third is overlooking doors and movement. Drawer units, door-mounted racks and deep cubes need operating clearance. Measure the storage while doors are open, closed and moving through their normal path.
The fourth is filling every compartment immediately. A layout with no spare capacity will become crowded after the next purchase, laundry cycle or seasonal change. Organisers should introduce boundaries, not create permission to retain unlimited items.
The fifth is placing rarely used belongings at eye level. Prime wardrobe space should support ordinary routines. Formal clothing, travel gear and spare bedding can move to less accessible positions when they are stored appropriately.
Choose a Closet Organiser in Five Practical Steps
Start by listing the item groups that currently cause the most disruption. Solve those groups first instead of rebuilding the entire wardrobe around a vague goal to create more storage.
Measure the exact space available, including depth, obstructions and door movement. Compare those dimensions with the finished product, not an estimated footprint.
Select the required storage modes: long hanging, short hanging, shelves, cubes, shoe storage, accessory compartments or seasonal bags. A product should earn its space by solving at least one clearly defined need.
Check material, assembly method, load information and access. A suitable organiser must support the intended contents and remain practical during everyday use.
Finally, sketch the proposed layout and assign every section before ordering. If an item group has no destination on the sketch, the plan is incomplete.
When assigning those destinations, deliberately leave one shelf, cube or rail section partly empty. Use it as a controlled landing zone for clean laundry awaiting sorting or a new garment entering the wardrobe. That small buffer prevents temporary overflow from becoming another permanent floor pile.
Frequently Asked Questions
Can renters install closet organisers without changing the wardrobe?
Yes. Freestanding rails, modular cubes, fabric-covered closets and suitable over-door organisers can add storage without rebuilding an existing wardrobe. Measure the available floor area, door clearance and ceiling height before choosing. Check the product’s assembly and positioning instructions, particularly where a tall unit includes fixing guidance. A format that can be dismantled may also be easier to move between rental properties.
How do I measure for a wardrobe organiser?
Measure the smallest internal width, depth and height of the intended position. Note skirting boards, rails, hinges, shelf supports and uneven walls that reduce usable space. Test the movement of wardrobe and room doors, then measure the forward clearance needed for drawers or removable bins. Compare these figures with the product’s fully assembled dimensions and allow enough room to access clothing comfortably.
Are open or covered wardrobe organisers better?
Open organisers provide immediate visibility and suit clothing used frequently, while covered systems conceal mixed storage and give occasional items some separation from room dust. The better choice depends on access and location. An open rack may suit a walk-in robe or dressing area, whereas a covered closet can make a bedroom without built-in storage appear more orderly.
How much weight can a modular closet organiser hold?
Capacity varies by product and should be checked on the exact listing. The featured wire grid system, for example, has a stated maximum load of 9.9 kg per cube. Spread items across the structure and use lower compartments for denser belongings. Do not assume that a custom configuration retains the same performance unless it follows the supplied assembly guidance.
How can I keep clothes fresh in a closet organiser?
Store garments only when they are clean and fully dry, and avoid compressing shelves so tightly that items cannot be removed easily. Open organisers naturally expose clothing to room airflow, while enclosed systems should be opened regularly during use. Clean shelves and covers according to their materials, and inspect seasonal clothing when rotating it rather than leaving sealed items unchecked indefinitely.
What do people commonly regret when buying wardrobe organisers?
A common regret is choosing a unit by overall size without checking shelf spacing, hanging drop or door movement. Buyers may also underestimate tall footwear, bulky jackets and the number of folded-item stacks they own. Complete an inventory and assign each compartment before ordering. This reveals whether the proposed organiser has the right mixture of rails, shelves and accessory storage, rather than simply more capacity.
 Tags:
Tags: